Showing posts with label table topper. Show all posts

Jul 30, 2012

Great Granny Table Topper

This was such a fun little quilt to put together, it measures about 45" X 45".
As I showed you last week, I finished all nine blocks.


I didn't take any photos of sewing the sashing and the borders.
I sandwiched the quilt top, the quilt batting and the backing and pinned it all together with curved safety pins.
I use safety pins on small projects because I can't stand basting!


When I first started quilting, I quilted by hand.  After a few quilts, I realized that even using a thimble my fingers were so sore that I didn't have any feeling in them.  I thought it was best to machine quilt.  I really love this process.  I look at the quilt for a few minutes and determine what method of quilting I should do.  I felt that stitching in the ditch wouldn't take away from the beauty of the fabric in the squares.  If you don't know what stitching in the ditch is, it is stitching on the seam line.


After all the ditches were stitched, I outline stitched each square.


The quilting is finished!


I bought a beautiful Amy Butler fabric for the back of my quilt.  I wanted a bright color for the binding, to keep the theme of the colors in the squares.  I picked an aqua polka dot out of my stash and auditioned it with the Amy Butler fabric.  I like it.


I have a Robert Kaufman app on my smartphone which I use for calculating the binding.  It told me I needed 5 strips for my binding. I cut the strips and sewed them together and pressed them in half.


Now I'm attaching it to the quilted quilt, using the method I showed you in my binding tutorial part 1 and part 2.


The table topper is finished :)


I decided to sew little circles on the sashing and borders of the quilt.
Here are some closeup photos.


I love the back of the quilt!


See how the stitching in the ditch shows up on the back?


I love finishing a project.  I put in it various areas of the house and admire it as I walk by!  Am I weird?  lol


post signature

Jul 27, 2012

Great Granny

Hello everyone! 
 My friend Lori, is having a "Great Granny Along" on her blog,
 Bee in my Bonnet. 
 You can find part 1 here.
I had a great time making the squares, they are very addictive. 
 You just love how one block turns out and can hardly wait to get started on another!
It has also been fun looking at everyone else's blocks on flickr and on other's blogs.
Lori made 9 blocks which created a table topper.  That is exactly what I wanted to do.  I am going to machine quilt it myself and I can only manage table toppers, table runners and baby quilts.
I decided to make each of the 9 blocks a different color.
I was able to use my scraps, which to me means anything smaller than a fat quarter.
The first thing I did was cut all 25 - 2 l/2" squares.


I turned all the squares so they were on point.
I sewed the 3 squares together on a row, then the 5, then the 7, etc.


After I had sewed the blue squares in rows, I added a white rectangle to the end of each row, excluding the middle row.
I sewed the rows together to make a block, and then sewed four longer rectangles on each end, centering them.  
The block's edges now look like stairsteps.


Each block will be cut to 12 l/2", so I simply center my 12 l/2" square ruler over the block.


With my rotary cutter, I trim off all four sides, even with the ruler.


I did mine a little differently.  I chose a colorful center, and surrounded it by the same fabric print.  All the other squares in the block are different, giving my great granny a scrappy look.


I love this aqua block, the colors are so soft.  Almost every square of fabric brings back a memory.  An outfit I made for a grand daughter, a quilt, doll's dress, bag, etc.


I love the elephant that I fussy cut in the center of this pink block.


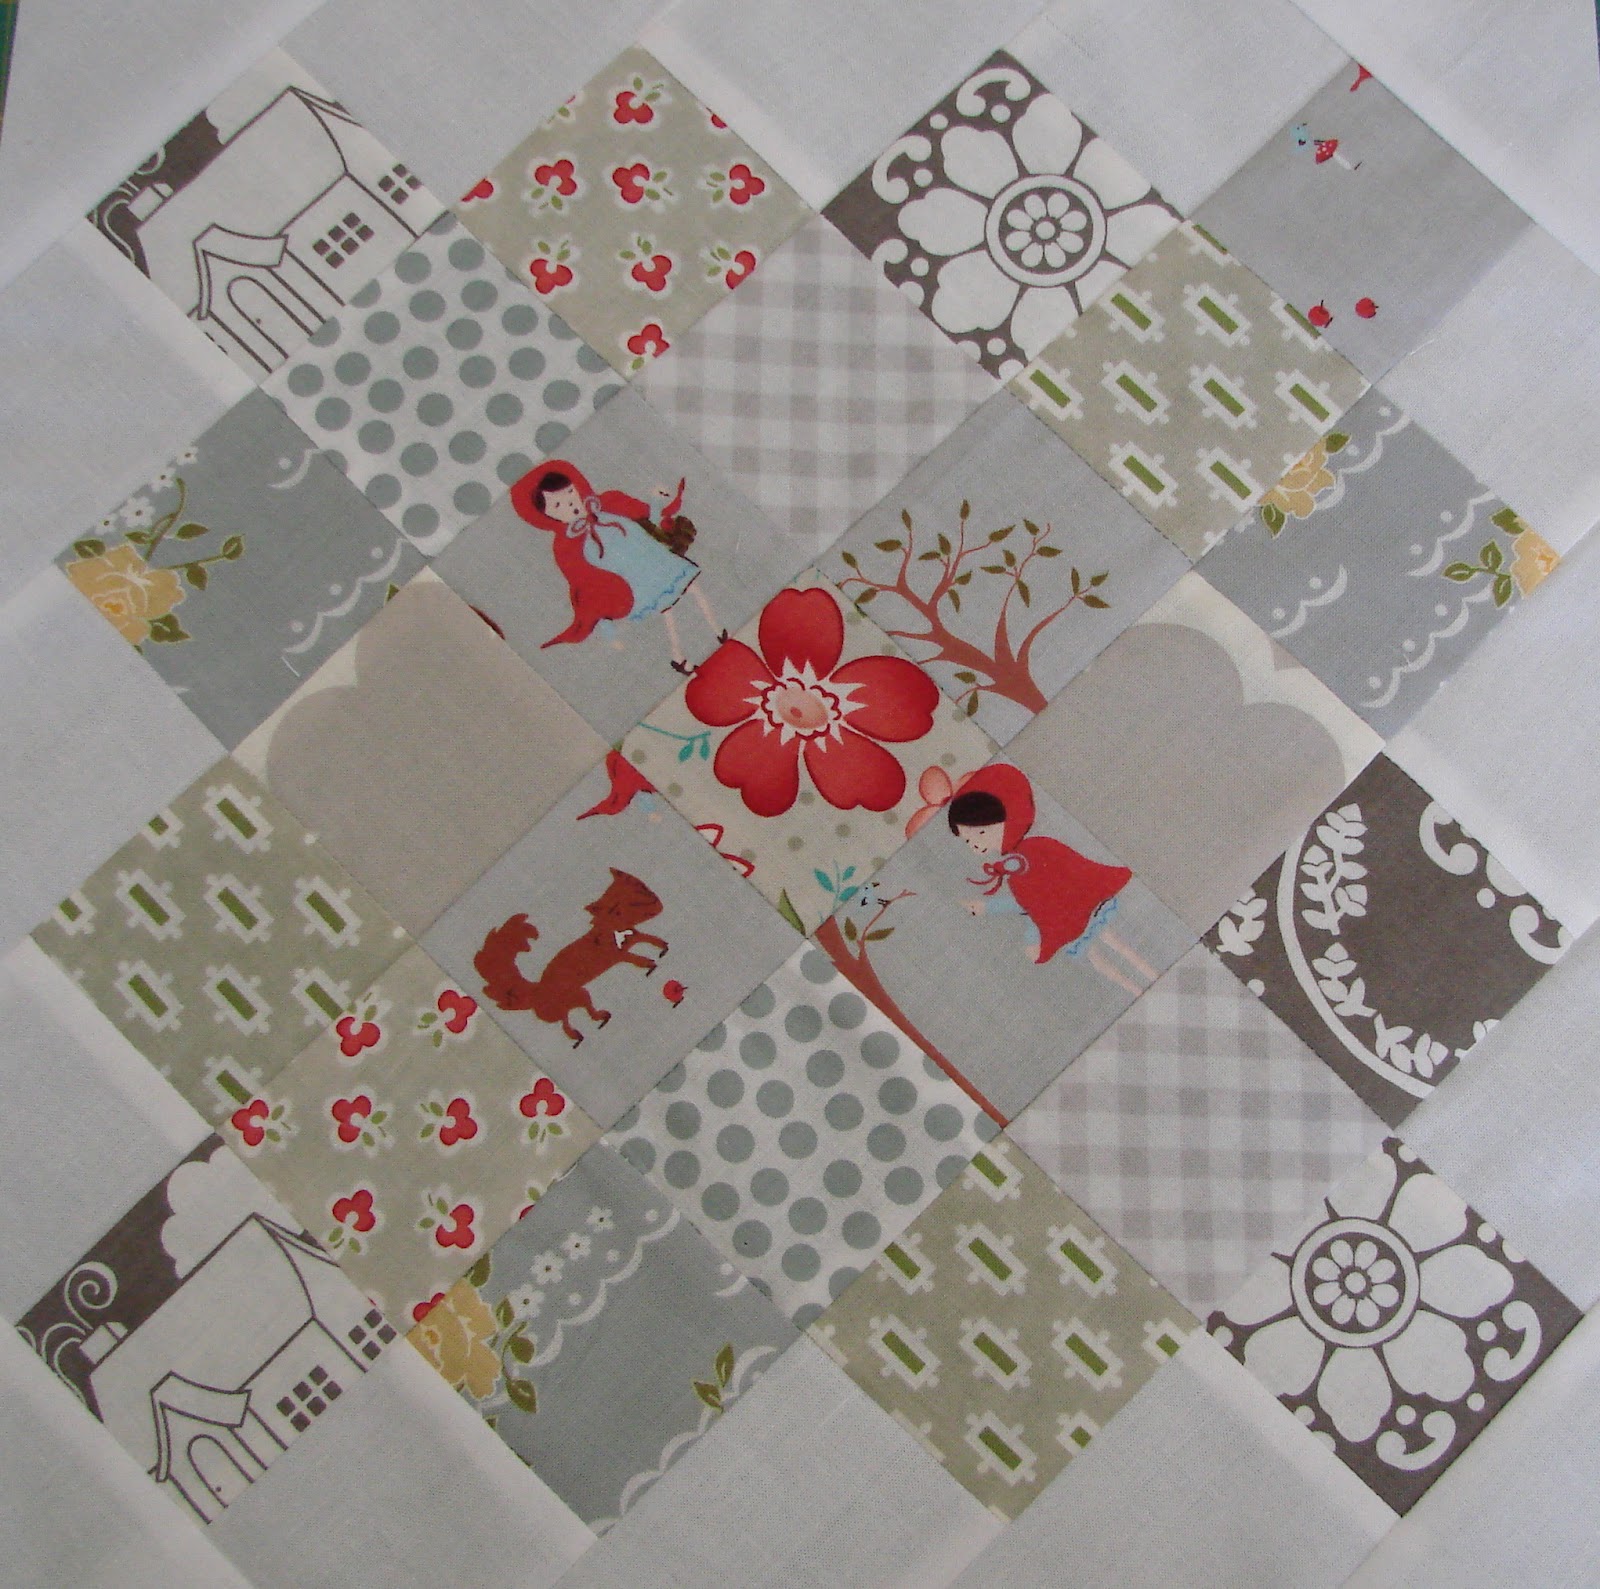
I thought the gray block was really different.  I was thrilled to have little red riding hood fussy cut for two of the squares, including the big bad wolf and a pretty tree that is in the fabric line "A Walk in the Woods".  I also love the grey houses and flowers from "Daisy Cottage" by Lori Holt who is hosting the "Great Granny Along".


I had a harder time finding enough oranges, so I had to use some 30's prints.  I really like the butterfly in the middle.


I love the red, and like the apples I was able to find in my stash.


Can you see a little baby's head in one of the squares?
I am making a baby quilt with that fabric.


The little car and elf are pieces of some Japanese fabric that I have.
Can you tell that I am reminiscing about all the fabrics I used?  lol


It was really hard to find enough purple pieces.  I had to dig into my 30's prints and civil war reproduction fabrics.


All 9 of my blocks are sewn.  I really love the fact that each one has their own color scheme, it's very colorful.  I think I was inspired my the mini granny that I made here.


On Monday, I will show you the finished table topper, sashing, quilting, binding and all :)

post signature

Jul 13, 2012

Peppermint Pizzaz

Peppermint Pizzaz is a 43" X 43" table topper by Cotton Way.
The cutting instructions are simple, as well as the sewing instructions.  Because of the pinwheel stars and flying geese, I would call this an "intermediate" level pattern.  I enjoyed sewing it, but am not pleased with the colors I chose.


I love the fabrics in the peppermints, they are from the Vintage Modern line, designed by Bonnie and Camille.

The peppermint sticks were supposed to be sewn a different way.  The pattern says to cut six strips of fabric, sew them together, and then cut them on the diagonal for the peppermint sticks, with skinny borders around them.  I thought the red and white striped Vintage Modern fabric with little polka dots was perfect for the peppermint sticks, so I just cut the fabric into peppermint shapes instead of using the method stated in the pattern.  
I prefer the peppermint sticks in the pattern, versus mine!


The star quilt block is one of my favorites, and I especially like this one with the pinwheels in the middle :)  
The fabrics I chose for my table topper are much too faint.  
There should be some popping of color going on.....some rich reds.
I like my background compared to the one in the pattern, it is from the Ruby line.


It took a lot of sewing hours to finish this table topper.  Too many just to have it sit on the kitchen table.  
It would make a pretty wall hanging but I don't really need one.
I'm really not that thrilled with the results, mainly because of the colors (or lack of color) of the stars.
I have a confession.......as I was sewing the rows of the table topper together, I was watching TV. I guess I wasn't paying attention and sewed the rows together without the sashing. Ugh! I had to do a lot of seam ripping......ouch!

I still need to purchase some fabric for the back so that I can machine quilt it, and will show you the finished product.
Did I mention that I'm teaching this class at the quilt shop?


post signature

Jun 27, 2012

Mini Granny

I have been dying to make a granny quilt but haven't had the time.  Instead, I made a mini granny table topper.  I have a large Ikea box with small scraps and another large box with large scraps.  Not to mention all the other fabric I have, but right now I will concentrate on my scrap boxes....lol!  I rummaged through my box of small scraps and cut l l/2" squares of reds, pinks, blues, greens and yellows.  I wanted  an  orange block but unfortunately, I don't have many orange scraps.


It takes 26 squares of colored fabric for each block, and 25 squares of white.


I love my design boards, I really really love them!  I used the tutorial from Lori's blog.  I also made two large ones which I use a lot too.


I think I only had to duplicate one print, I have a lot of scraps!!!


There is something so satisfying about cutting pretty fabrics and sewing them up, especially in miniature!


Something else I find very satisfying while I'm cutting and sewing, is chocolate :)


.....and more chocolate, until.......


.....all the chocolate is gone!  Yes, this bag of m & m's was my friend while I constructed this mini granny.


Yeah, all of my blocks are done, little mini 6 " blocks.  They are so cute and I enjoy looking at each and every print and remembering what I used them for.  Kennedy's dress, Lindsay's bag, Comforts of Home quilt, Christmas table topper, rainbow charm pack swap, swoon quilt, Rebecca's quilt, the farmer's wife quilt, Bridger's baby wall hanging, and on and on and on......the journey of a quilter :)


It almost looks like lace, doesn't it?  Now I am going to trim the blocks, leaving a l/4" seam allowance on all four sides.


This is my larger design board.  I love it and I use it a lot!
Now the blocks are ready to be attached using l " sashing.
I see more memories in the squares :) 


The quilt is pinned and ready to quilt.  I am going to hand quilt it, so it may be a while before I finish it as I have so many projects going at the same time, and I keep adding new ones.  I will get everything finished, it makes life more interesting when there are so many things to work on :) 
I am going to hand quilt this little table topper (25" square) with colored embroidery thread to match each block, in an outline stitch.
I love it, it's really colorful and happy!
By the way, I didn't make a dent in my box of small scraps...lol

post signature

Jun 11, 2012

A New Project

Cotton Way - Peppermint Pizzaz


Christmas is coming, it's almost July!  I will be teaching this class at Sew Katie Jean, it's a square table topper.  Instead of the aqua background, I will be using the "Ruby" red polka dot at the bottom of the pile.  The peppermint sticks are all pieced and cut on the diagonal, but I will simply be using the "Modern Vintage" red and white striped polka dot fabric.  The green and red "Modern Vintage" to the right will be the peppermints, and the rest of the prints in the pile will be the stars.  Since it is a small project, I will machine quilt it myself.  I should have it done by the end of the month.  I'll show you my finished table topper then!

post signature