
I like to cut my binding strips 2" wide for double-fold binding.
I like this size because finished double-fold binding sews on smoothly with a l/4" seam allowance, hugs the edge of the quilt, makes a neat miter fold, and covers all stitching when it is turned over the edge of the quilt.
Many quilt patterns call for a 2 l/2" wide binding, but my preference is 2". DON'T cut your binding on the bias unless it will be going around a curve.
If you have a smartphone, Robert Kaufman has a great app for calculating the yardage needed for the binding on your quilt.
It is better known as The Quilters Little Helper.
All you do is add the dimensions of your quilt and the width of your binding and the app will calculate exactly how much yardage you need for your binding. It provides lots of other calculations as well!
Here is my mini granny mini quilt. I posted about his quilt here.

Since the mini quilt is so small, it wasn't a bother to hand quilt around the mini granny squares. I have always loved this look and decided to use embroidery thread that matched the color of each square. I used DMC floche. The cotton thread has a lovely, silky feel to it. I always use this thread when I smock.
I thought about machine quilting inside each square, but the blocks are so little they don't really need it. It might also detract from the hand quilting.

Cut off the excess batting and backing, flush with the quilt front.

Whenever I attach binding to my quilt, there is always some leftover. When I was making my Swoon quilt, I pre sewed the binding. When the quilt was quilted and ready to be bound, I changed my mind and used another fabric for the binding. I save all my bits of binding, some longer than others. I'm just going to pick some bright colors out of my binding basket and sew a scrappy binding.

I think these ones will look fabulous!

Now I need to join my binding pieces together. I would do this even if I were using 45" long strips of the same color.
Place two strips right sides together, crossing the ends at right angles, leaving a l/4" overlap on two sides.

Sew a straight line from point to point.


Trim the seam to l/4".


Press the seam open.

Now fold your binding in half, wrong sides together.

I sewed all my binding strips together, pressed the seams open and folded them in half and pressed again.

Avoid starting to sew the binding exactly in the middle of a quilt edge. Each time you fold your quilt in half, it will weaken at that spot. This is a mini quilt (15" X 15") so that rule doesn't apply.
Don't pin the binding to the entire quilt before sewing. As you sew, the binding may "bubble up" between the pins and cause little tucks.
As you sew, concentrate on the 3" of binding directly in front of the sewing machine needle. Lay the first 3" in position and sew, then go on to the next 3". Before long, these 3" lengths will add up to the entire quilt!
Place one end of the binding 6" from one of the corners. Align the cut edges of the binding strip with the cut edges of the quilt. Start sewing 4" from the beginning of the binding.

Use a l/4" seam allowance, there is no need to backstitch when you begin to attach the binding.

A straight pin will help you mark the place l/4" away from the edge, to stop stitching.


Fold the binding so that it extends straight up from the second edge of the quilt. You'll be creating a diagonal fold, which will create the miter.

Fold the binding down, aligning it with the second edge of the quilt. The fold should be even with the first edge of the quilt.

Sew the binding to the quilt from the top, using a l/4" seam allowance.

Repeat these steps for the remaining corners on your quilt.

Stop sewing the binding approximately 6" away from the starting point.


Cut the end of your binding with a perpendicular cut so that it overlaps the beginning end of your binding. The length of the overlap must equal the width of your binding strip. I use a 2" overlap for 2" wide binding. You would have a 2 l/2" overlap for 2 l/2" binding, etc.

There is a 2" overlap, because my binding is 2" wide.

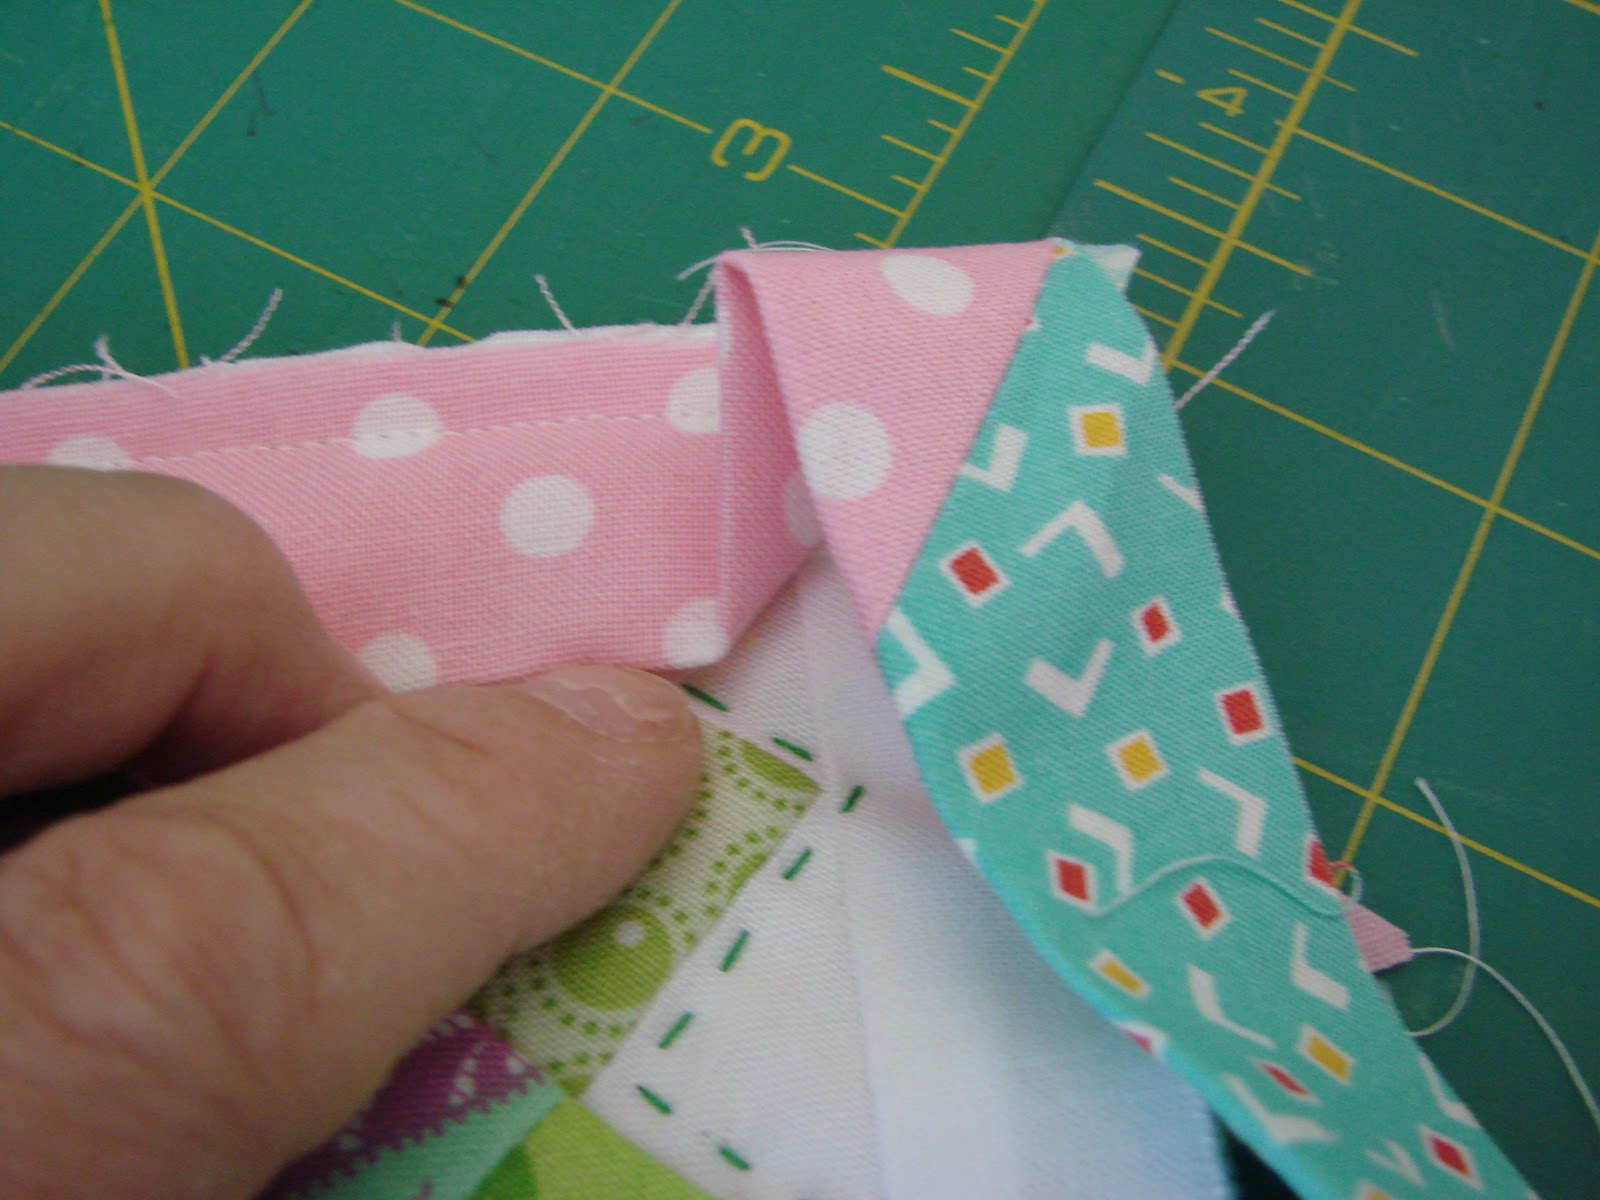
Open the folds of the two strips and overlap them at right angles with right sides together as shown. Pin them together. Draw a diagonal line between the two points where the binding strips intersect as shown. (I've done this so many times that I don't draw the line anymore)

Here is a diagram that might better illustrate the directions.

Sew the ends together on the marked line (from point to point).

Trim the seam to l/4".

Press the seam open.

Refold the seamed section of the strip, return it to the edge of the quilt.

Finish sewing the binding in place, it is a perfect fit!

Trim all the threads from your corners and the little triangle bits.

Congratulations, you are now ready to sew the binding onto the back of the quilt.

I will share that with you in Part 2, Friday's post.

That is the cutest quilt I have seen made using the granny squares!! Adorable!
ReplyDeleteWhy do you recommend not cutting the binding on the bias? I had learned that the binding lasts longer if it is cut on the bias. I have a quilt that I used a straight cut binding and it is falling apart. I thought that it was stronger if the edge was cut on a bias.
ReplyDelete