Oct 26, 2012

Paperdoll Block Applique, part 3


This is the last applique tutorial for the paperdoll block.
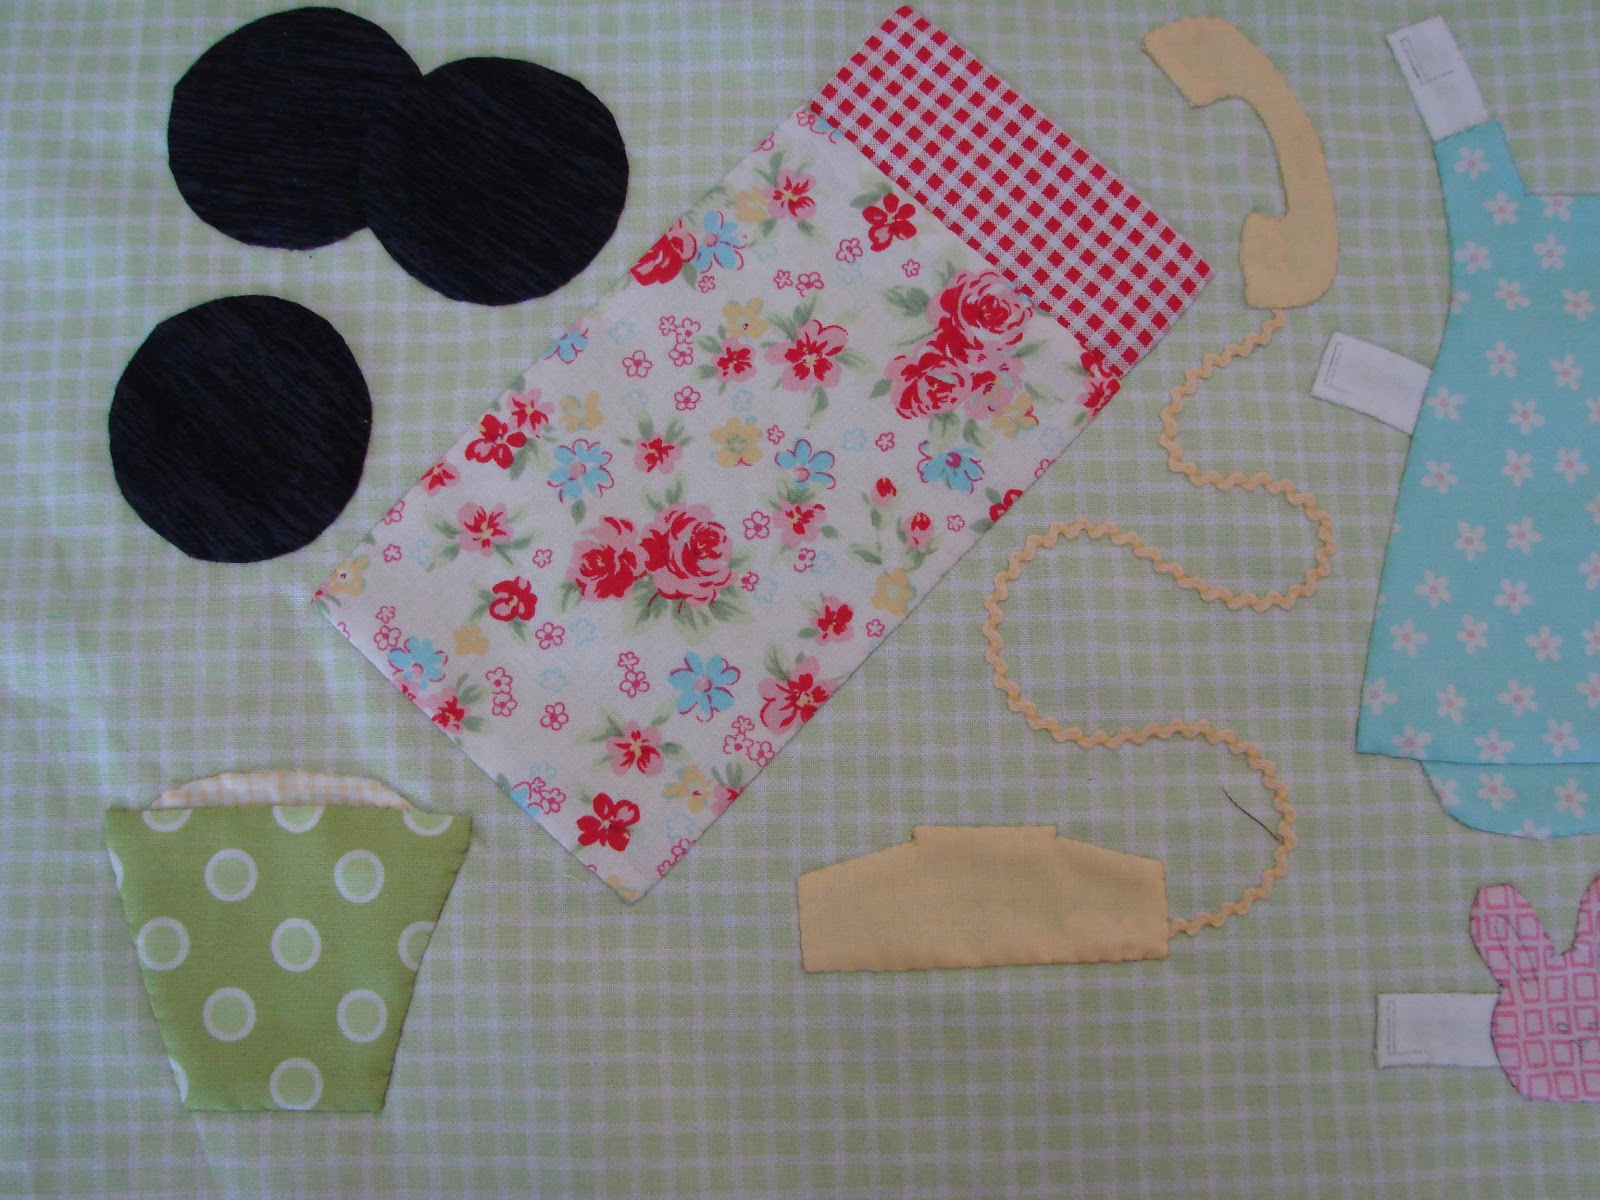
The red gingham piece is the cuff of a pillowcase that I appliqued.


Isn't the vintage fabric for the pillowcase cute?  There is a little, teeny white pom pom trim that is sewn between the cuff and the pillowcase.  Notice the white piece that is appliqued in the bottom left corner?  What do you think that will be?


I don't know if you can tell yet, but it is a bucket of popcorn.  It will come alive when it is embroidered.


The records, are you old enough to know what they are, or are you too young?  I traced the circles onto quilting heat resistant template plastic.  Just like making a yo yo, I ran a gathering stitch around the plastic, pulled it tight so that the seam allowance folded over the template plastic.  Then I sewed a few stitches to keep the gathering stitch from coming undone.  I took the circles to the ironing board, sprayed it with some starch and pressed them.  Then I removed the template circles and was left with perfect circles.


The circle comes out easily and the fabric pops right back into shape.


See how many times I had to make the circles and sew the gathers?


They do look like records.


I position the record under the tracing paper to make sure it is in the right spot.


All of the records are appliqued.


The next layers of the records are appliqued.


Now the third layer is added.  I wanted to show you all the steps it takes to complete on of these paperdoll blocks.  I bet you had no idea!


I added the lettering at the bottom by taping the paper pattern to my light box and tracing the writing onto the fabric.  I free handed the ribbon trim onto the baby doll pyjamas. There is some other tracing on the fabric too.  The telephone has some tracing and so does the popcorn.


Next week I will show you how the applique comes alive with embroidery.  It makes a huge difference!

post signature

Oct 24, 2012

The Farmer's Wife quilt

After almost two years, I finished "The Farmer's Wife" quilt!
I wrote about it here and highlighted each of the blocks.
To see the quilt before it was machine quilted, go here and scroll down a little.
My friend did a beautiful job with the quilting!
I am going to add jumbo rick rack.


I wanted the rick rack to be next to the binding.


I had to cut the ricks off the racks so that I could attach the binding.


Here is my little pile of jumbo ricks.


Originally, I wanted to use a little black print for the binding.
I looked at a few quilting shops and couldn't find one that I liked.
I needed a color that matched the red border, the yellow jumbo rick rack, and the lavender back.  Finally, I settled on mint green.


I think the jumbo yellow rick rack looks really good with the 1930's Aunt Gracie prints that I used in the quilt.


It's easier to show you corners of the quilt...


.....because it's difficult to capture the entire quilt with my camera!


See what I mean?  I laid the quilt on the floor and stood on a chair.


This shot is a little better but not great.


I found this fabric on clearance, it is Sarah Jane's Children at Play, which is a favorite of mine.  


There is a lot of lavender in the blocks, so this fabric was perfect for the back.
"The Farmer's Wife" quilt was a labor of love.  I was going to give it away but I don't think anyone would appreciate it as much as me!


Thanks for sharing my journey with me :)

post signature

Oct 22, 2012

Baby Brit Quilt Along, week #11

 I showed you last week how I quilted in the ditch, and I think it makes the Union Jack blocks "pop".  I was afraid that if I did an "allover" design, that I might ruin the look....just because I'm not that experienced in machine quilting :)


I went to town on the sashing, doing a jigsaw design.  I tried to keep it as little and close together as possible.  I love the results!


I started seeing double after a while....that's a lot of stitching!


I wanted something different for the border.  I thought of flowers, but I did that once before.  I practiced a pretty swirl design on paper so I could get the hang of the curve of the swirls.


It's hard to see on the white, but here are the swirls!  


I'm pretty excited about the results.  I guess it just takes practice :)


This is the quilt, completely machine quilted.  I think it took me about 11 hours to quilt.  An hour for each of the Union Jack blocks, 3 hours for the jigsaw quilting, and 2 hours for the border.


I always love to look at the back of the quilt, but don't look too closely!  I really think that if my quilter didn't live in another state, I would have commissioned her to quilt my Baby Brit.  Then again, she just quilted two quilts for me and the expenses do add up.


Next week I will show you how I bound this quilt and that will be the end of our Baby Brit quilt along :)

Oct 19, 2012

Paperdoll Block - Applique Tutorial, part 2

This is part 2 of the tutorial, you can find part 1 here.

Now that the baby doll pyjamas, the bunny slippers and the tabs are appliqued, it is time to transfer the squiggly line for the rick rack onto the fabric.  I tape the paper pattern onto my light box and position my foundation fabric on top of the pattern so that it is perfectly lined up.


Here is the squiggly line that I traced.  It is really important to transfer all the markings perfectly, or almost perfectly :)


I glue the rick rack down with Roxanne's baste it glue.


I thread my needle with 2 strands of matching embroidery thread and stitch along every rick and every rack.  It is amazing how this simple technique makes the rick rack look just like a telephone cord.


Here is a close up of the stitch.


This is what the stitches look like on the back.


After the rick rack is glued and stitched, it is time to position the phone under the tracing paper.  When I know it is in the right spot, I glue it down with a couple of dots of glue.


Then I applique the phone using the needle turn method.


Now I position the phone receiver and glue it in place.


The phone has been appliqued!  Step by step, the block will soon be completed.


I have been showing you all of my paperdoll blocks and as I mentioned before, this is the last one.  I wanted to show you the method that they are appliqued and embroidered so that you would see how labor intensive they really are.

post signature

Oct 17, 2012

Bee in my Bonnet Row Along


I've been working on Lori's Row Along, and having a great time doing it!  I showcased the fabrics I chose for the quilt and Row 1 here.  The butterflies are Row 2.  For me, the best part of making a quilt is choosing the fabric :)


I know this photo is sideways, but that is how the butterfly row will be sewn into the quilt.  The fabric for each butterfly was chosen with great care!


This is rows 1 and 2 together.  Lori is designing the quilt as she goes although I know she has the large picture in her head.  Even though the rows are numbered, we don't really know what order they will be in the quilt.


This is row 3, zig zags.


This is Rows 1, 2 and 3 together.
Peekaboo to my fabric hording.....er, stash! LOL


This is Row 4, don't you just love the apples?  I made 2 large design boards and really love them!  They are from Lori's tutorial.


McIntosh, Gala, Fuji, Granny Smith and Pink Lady apples.  Isn't the apple core cute?  I also took great care in choosing the greens for the leaves.  Each of the leaves is a different fabric.


Golden Delicious and more varieties of red apples.


Rows 1, 2, 3, and 4.  This is going to be the cutest quilt!  My husband is going to say, "What are you going to do with this quilt?"
My reply, "I don't know, enjoy it, admire it, perhaps give it away?"
What would you say to your husband as I'm sure he wonders what you are going to do with all of your quilts too!!!


post signature