Mar 28, 2012

Lined Travel Bags

My friend Lori posted a great tutorial on her blog.
I had been looking for some gifts to make and when I saw these Lined Travel Bags, I knew they were perfect!  I made eight of them.


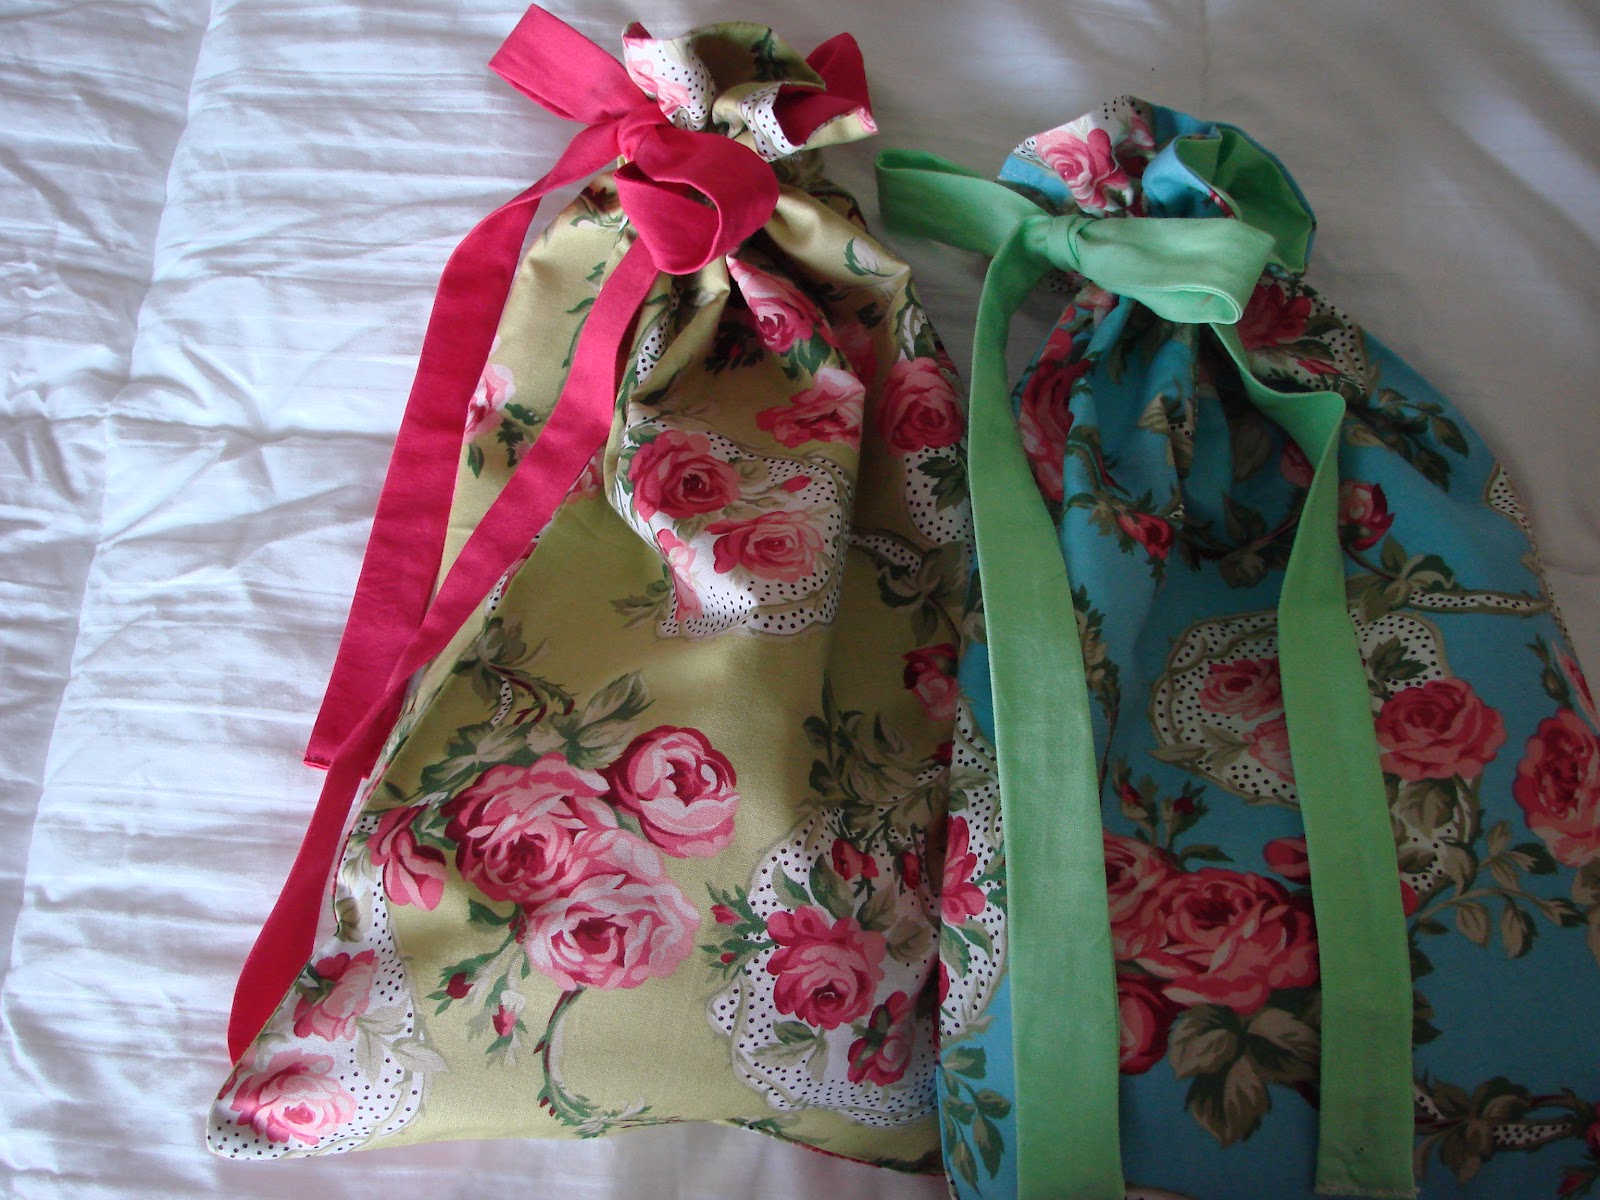
They are pretty big, 10" wide and 16" tall.
  You can use them for hair products such as a bottle of hair spray, a hairbrush and a curling iron.  All of that will fit in one bag.
You can use the bag for a pair of shoes, sweaters, undergarments, exercise clothes, etc.
The lining matches the bows!


I just love these bags, they are so pretty and feminine.  


If you want to make one, the tutorial is here.


Don't forget my GIVEAWAY!!!
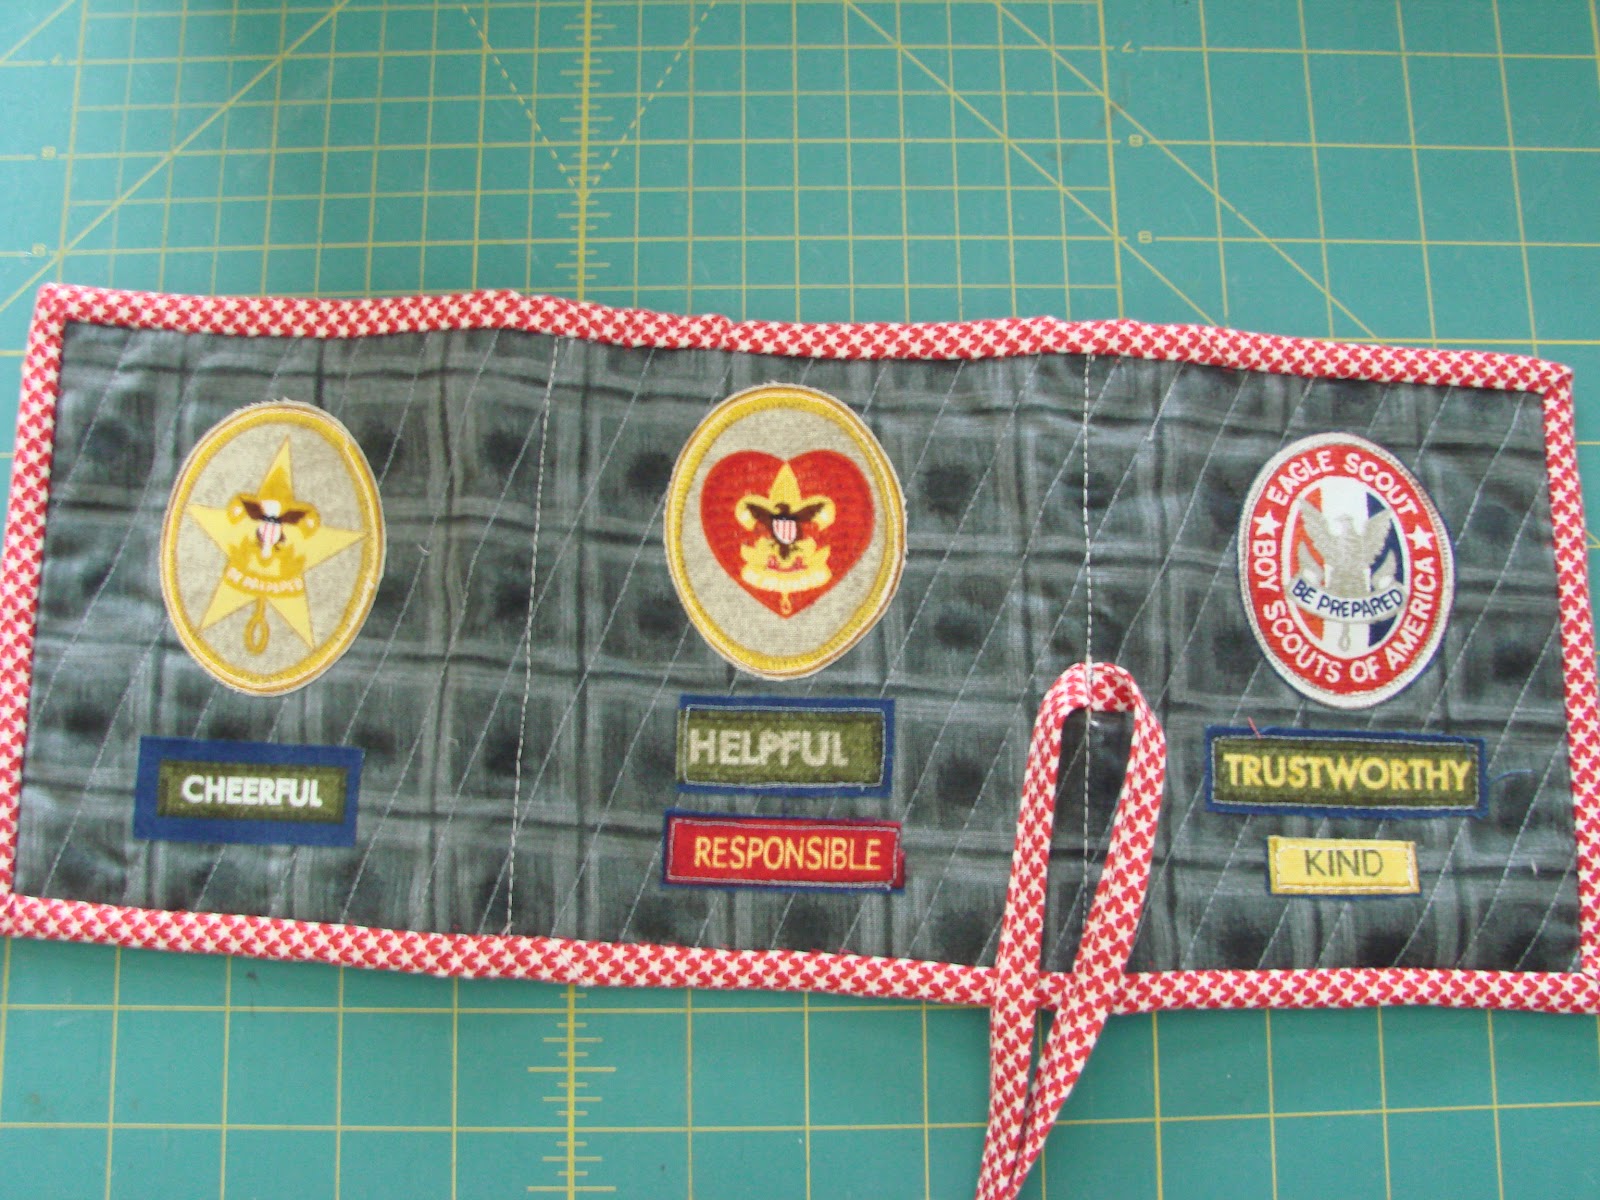
This trifold sewing kit.


You have four chances to win......
Post a comment here.
Sign up to be a follower on my blog and tell me that you did. 
Go to my facebook page here and LIKE the page.
Leave a comment on my facebook page, dream quilt create.

post signature

Mar 27, 2012

Sewing kit tutorial and giveaway!!!

This is the cute "girlie" sewing kit that I made for you, to be won in a giveaway!


As promised, I will give you a tutorial for the sewing kit.
Cut your pieces as follows:
  • exterior:  15" X 6"
  • cotton batting:  16" X 7"
  • inside panel pieces:  cut (2)  5 l/4" X 6" and (1) 5 l/2" X 6"
  • pockets:  cut (1) 5 l/4" X 4" and (1) 3 l/2" X 6"
  • scissor case:  (my scissors measure 4 l/2" long and 2" wide at the widest part of the handle)  The bottom of my scissors holder is l" wide plus l/4" on each side, equaling l l/2".  Make your triangle this size plus l/4" all the way around.  (reference to my polkadot fabric for the shape to draw your scissors holder)


  • binding (turquoise):  cut (2) strips 2" X WOF(width of fabric)
  • closure strap and thread strap (yellow):  
       cut (1) strip  1 1/2" X WOF 
  • needle book:  cut your wool felt piece 4 l/2" X 2 3/4" 
  • small piece of velcro:  l/2" X 3.8"
DIRECTIONS:
Quilt your exterior piece to the cotton batting.  Quilt as desired.  I quilted mine straight lines approximately l/2" apart.  You could quilt it in diagonal lines, or use stipple quilting, swirly lines all around.  To me it was really easy just to quilt straight lines.  I didn't adjust my machine at all to quilt, just adjusted the stitch to be slightly longer than normal to compensate for stitching through the thickness.


This is what my quilting looked like when I was finished.


Sew the binding to the two pockets, raw edges together.  Sew on the long edges and use a l/4" seam.


Fold the binding up and press so that you have a nice edge and can see clearly where the pocket and binding are joined.


   Fold the binding toward the back of the pocket, making sure that you fold the edge past the stitching line that you made when you sewed on the binding.  Pin well and sew "in the ditch" on the front.
Pictured is the binding and the stitching from the back.  Notice that the seam is caught in the stitching.


Place your bound pockets on the two side panel pieces lining up the bottom edges.  Make sure that you have the two panels that measure 5 l/4" X 6" (the middle panel is slightly larger, make sure you don't sew a pocket on to this panel).  Pin and baste the pockets onto the panels.


Now we will join the three panels together.  Sew them right sides together using a l/4" seam allowance and then press the seams open.  It should now look like this.


I divided the right pocket into two sections by marking the middle (top and bottom) and sewing down the middle from the top of the binding to the raw edge.  You can barely see the line that I stitched, but it's there!


To make the scissors case, iron the wide edge over l/4".  Then do the same to each side and then the bottom.  Finally, fold the top over l/4" again.  Topstitch the top edge of the scissors case where you folded over twice.


Fold your piece of wool felt in half and press so that you have a clear crease for a stitch line.  Now you are going to pin both the needle book (wool felt) and the scissors case onto the center panel. The scissors case needs to be l/2" from the top and l/8" from the left seam.  Place the folded edge of the needle book l/4" from the left seam and l/2" from the bottom edge.  
Sew down the crease line of the needle book and very close to the edge of the three sides of the scissors holder.  


 Press each end in l/4" and then refold the whole strip back up.
 DO NOT sew it yet.  
Cut 6 l/4" off this strip to make the thread strap(goes in the middle).
Only one short end needs to be folded in on the short strap but you need to fold in both short edges of the long piece so that all of the  edges will be encased.
Sew down each of the long sides and the ends to close up the straps.


Now sew down each of the long sides and the ends to close up the straps.


I'm sorry that this photo is so blurry.....
Pull apart your tiny piece of velcro and sew  the fuzzy piece onto the finished end of the short strap.  This is your thread holder.


Place the loopy piece of the velcro and place it along the left seam of the interior piece.  It needs to be 3/8" from the bottom edge.....( I accidentally sewed mine on the top edge.  When I realized my mistake, my kit was already sewn together.  I don't think it makes a huge difference, so I left it!


Sew the strap to the bottom (or top!) edge, keeping enough slack to hold two spools of skinny Gutterman spools of thread.  

Trim the exterior piece, by placing your ruler on top of the fabric and trimming off the excess cotton batting, flush to the edges.


Now it's time to attach the exterior and the interior along the seam lines on the interior.  Place your exterior piece face down on your table and then place your interior piece face up. 


Align the edges so that your corners and edges are all matched.
First, stitch down the two long seam lines, attaching the exterior and interior pieces together.  


Attach the binding on the outside, all the way around.  


Handsew the binding on the inside, just as you would a quilt.


Almost finished!!!


All you have left to sew is the tie.  Take your piece and mark 12" from one finished end.  Take your sewing kit and place it face up on your table.  Find the stitch line on the exterior that corresponds to the left seam line on the inside.  
Stitch your tie to the exterior but you want the stitches to be disguised by the seam on the inside.  
Find that seam on the exterior and mark the middle.  It will be 3" from the top and bottom and approximately 5" from the right edge when the piece is laying exterior side up on the table.  Match the two marks, the one on your tie and the one on your strap.  
Pin in place and sew on the inside to make sure the stitches are masked by the seam.
Now you are finished!!!


I promised a giveaway.....
To win this cute "girlie" sewing kit, all you have to do is "join this site" and become a Follower.  The place to join is located on the right side of this blog, underneath my button.  Then, leave me a comment.  I love comments ♥  If you have already a follower, then just tell me in your comment.
I will use the "random number generator" to choose a winner.
The comments close this Thursday, March 29 at 7:00 p.m. Pacific time.  I will announce the winner on Friday!
I sure hope you win!!!!
post signature

Mar 25, 2012

Sewing Kit

I made this sewing kit for my son who is going on a church mission for two years to Brazil.  
My son is an Eagle Scout, so I thought that it would be "manly" to use this theme.  Besides, everything else I have is pink with flowers.
I had some Boy Scout fabric that I made a quilt out of a few years ago, so I made this sewing kit from the scraps. I cut out the rank badges and the words from the Scout law from the fabric, ironed them to wonder under and ironed them onto some charcoal colored fabric.  Then I outline stitched them so they wouldn't unravel.


 The vertical tab (red star fabric to the left of the felt) holds two spools of thread and closes with velcro.


I like all the pockets and the scissor holder.


This is the back of the kit.


These are all the things that are being put into the kit....a usb drive (non sewing related....), iron on reflective tape, thread holders, iron on mending fabric, a seam ripper (who doesn't need one of these!!!), folding scissors, safety pins and a "pink" tape measure (you never know!!...about the tape measure I mean, not the pink :))


 Here is the sewing kit fully loaded!!!


Come back tomorrow.  I made a really cute "girlie" sewing kit, complete with a TUTORIAL and a GIVEAWAY!!!!
post signature
\

Mar 22, 2012

Monster Smoothie


Now for something a little bit different.
I try to go to exercise class every morning.....and when I come home I like to have something healthy, filling and low calorie.  I have been drinking this Monster Smoothie for a couple of years now.  I have refined it somewhat and I think it is really delicious.


I used to use my blender, but it is big and a pain to wash out every day.  My husband bought me a little machine that you insert these special cups into.  It is so much easier to use!  It comes with about four or five of these plastic cups that go in the dishwasher.


One cup of milk, or a little less.  I like to use coconut milk, but didn't have any when I took these photos.  The coconut milk adds the perfect amount of sweetness.  I recommend trying it in the smoothie.


One banana, broken into pieces.


Two large tablespoons full of greek yogurt, about a l/4 of a cup.
Fage (pronounced fa - yeh) is my favorite because it is thick and creamy and has a great flavor.


One cup of frozen peaches.  The peaches add sweetness, and since they are frozen, they make the smoothie cold.  Don't use red or blue berries because your smoothie will be a nasty brown color.  I used to use fresh mangoes, but I prefer the frozen peaches.  Stuff the peaches down in the cup.


Now add a large handful (about one cup) of fresh baby spinach leaves.  It sounds gross to put spinach in a drink but you can't taste it. 


I squeeze the blade onto the cup and screw it on tightly.


Then I blend the smoothie until it is all mixed up, about a minute.


Now I can enjoy my very healthy, creamy and delicious Monster Smoothie.  Two servings of dairy, two servings of fruit and one serving of vegetables.  *You can add some ground flax seed for extra benefits.  Try it and tell me what you think :)


post signature