Aug 3, 2012

Travel Pillow Tutorial

My friend Donna asked me if I would write a tutorial on my
 travel pillow .  It's really simple but when I make something, I find it so much easier to visualize if I can look at photos.

My son said that his pillow is his favorite thing that he brought with him on his two year church mission to Brazil.  I made a note of that.....lol, and decided to sew him another pillowcase so that he can rotate them.  This time I went to the fabric store and chose some "masculine" fabric.  This is what I chose....


The printed fabric is called "how to press a shirt".  Very appropriate, since my son wears a white shirt every day of the week.  When Sean was 15 years old, he earned his Boy Scout Eagle award.  His grandfather flew in from Florida for the occasion.  His grandfather is retired Air Force and very strict about creases in the sleeves of his pressed shirts.  I had shown Sean how to press a dress shirt before, but it wasn't his forte.  Sean came downstairs with a perfectly pressed shirt, and even creases in the sleeves!!!  We were all impressed, including Sean's grandfather.  Later my father in law asked me where the iron and ironing board was.  I showed him and we noticed a paper on the ironing board.  We picked it up and it said, "Google:  How to press a shirt".  We laughed and laughed, so this fabric has a lot of meaning!  Ha ha!!!


The pillow form that I buy at JoAnn's measures 12" X 16".  I cut two pieces of fabric, 17.5" X 13.5" each. 


I get such a thrill out of choosing fabric, that I choose a different print for the front and a different one for the back.  If you want to use the same print for the front and the back, you still need to cut out two pieces.  
I also cut out 2 pieces 4" X 14", for the edging on the pillow.
Here are my cut pieces.


Place the two pillowcase pieces right sides together and sew along three sides, the two long ones and one short side, using a 1/4" seam.
Finish the edges with a zig zag stitch to encase the raw edges.


Turn the pillowcase right side out and press.


Now take the two smaller edging pieces, and fold them longways, right sides together.  Lay them against the short end of the pillowcase.  I did that, and saw that I needed to sew the short ends of the edging with a l/2 seam allowance.  


Turn the edging right side out and press.


Pin the edging to the pillow case, matching the finished seam of the edging to the side seam of the pillowcase.


Pin the same edging piece to the other side seam and then finish pinning the rest of the edging piece to the pillowcase, right sides together (there isn't a wrong side of the edging).  I usually pin when I sew, it leaves less chance of having to rip out stitches!  My seam ripper and I have a love/hate relationship....


See how the edging pieces meet perfectly at the side seam?  The other side seam looks exactly the same.  The two flaps give a little more "masculine" look.  


Sew the two edging pieces to the entire pillowcase, using a l/4" seam allowance.  Then zigzag, encasing the raw edges of the seam.


Press the finished seam toward the pillowcase and staystitch.  Staystitch means to sew a seam close to the seam, so that the seam won't "roll up" and will stay pressed towards the pillowcase.


This is what the seam looks like on the inside.  Since the seam has been staystitched, it will never roll up, but always stay pointing towards the pillowcase.


Here is the "how to press a shirt" fabric close up, isn't it cute?


This is the front of the pillowcase.


This is the back, a nice argyle print.


I made one for my husband, as a birthday gift. (it's Sunday :)


If you would like to add a ruffle to your pillowcase instead of the plain edging, the measurement is one and a half times the width.  Instead of cutting your edging 14" long, I would cut it 44" long. You only need one piece instead of two.  If I don't have a piece long enough in the print I want for the ruffle, I often piece the fabric, joining different pieces together.  The seams never show.  


When I sew a ruffle onto my pillowcase, I use one piece and only have one flap instead of two.


There are two flaps on the edging of the masculine pillowcase.


That completes my travel pillow tutorial.  If you make one, I would love to see some pictures!
post signature

Aug 1, 2012

Jim Shore

A few months ago, my husband and I were strolling down the streets of historic Folsom, California.  I noticed in the window of a storefront, that award winning artist Jim Shore was going to be at  Dorothea's on Sutter Street on July 28.  I wrote it in my calendar, and my sweet husband took me there on Saturday for Jim Shore's signing.  Are you familiar with Jim Shore's work?  He incorporates quilt designs into his work.  He is famous for patriotic, holiday and Disney pieces.  I chose a really pretty angel, called "I Welcome Thee".


I loved the rich colors and I have a lot of reds in my home.
The pineapple has long been recognized as a colonial symbol of hospitality and today remains a hallmark of warm and gracious entertaining.
I think her face is very soft and detailed.


Look at those gorgeous quilt blocks!


Jim was so personable!  I told him that I loved how he incorporated quilt blocks into his art.
He said, "My grandmother was a quilter.  She specialized in crazy quilts, and used to show me how she did the different embroidery stitches.  That made an impression on me and to this day when I create a piece and incorporate the quilt designs, I think of her."


I am now a huge fan of Jim Shore's artwork :)


post signature

Jul 30, 2012

Great Granny Table Topper

This was such a fun little quilt to put together, it measures about 45" X 45".
As I showed you last week, I finished all nine blocks.


I didn't take any photos of sewing the sashing and the borders.
I sandwiched the quilt top, the quilt batting and the backing and pinned it all together with curved safety pins.
I use safety pins on small projects because I can't stand basting!


When I first started quilting, I quilted by hand.  After a few quilts, I realized that even using a thimble my fingers were so sore that I didn't have any feeling in them.  I thought it was best to machine quilt.  I really love this process.  I look at the quilt for a few minutes and determine what method of quilting I should do.  I felt that stitching in the ditch wouldn't take away from the beauty of the fabric in the squares.  If you don't know what stitching in the ditch is, it is stitching on the seam line.


After all the ditches were stitched, I outline stitched each square.


The quilting is finished!


I bought a beautiful Amy Butler fabric for the back of my quilt.  I wanted a bright color for the binding, to keep the theme of the colors in the squares.  I picked an aqua polka dot out of my stash and auditioned it with the Amy Butler fabric.  I like it.


I have a Robert Kaufman app on my smartphone which I use for calculating the binding.  It told me I needed 5 strips for my binding. I cut the strips and sewed them together and pressed them in half.


Now I'm attaching it to the quilted quilt, using the method I showed you in my binding tutorial part 1 and part 2.


The table topper is finished :)


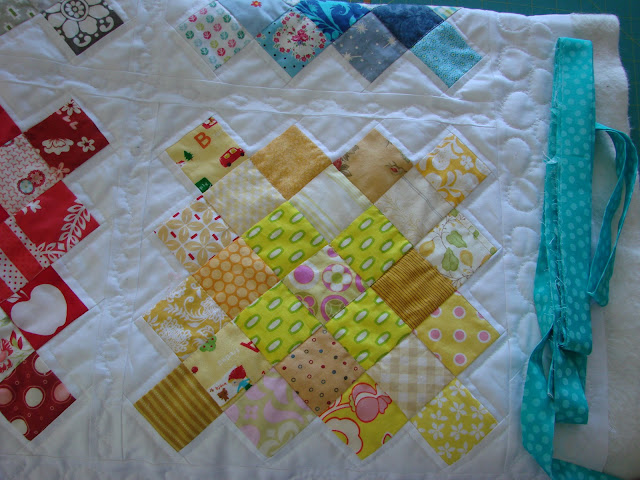
I decided to sew little circles on the sashing and borders of the quilt.
Here are some closeup photos.


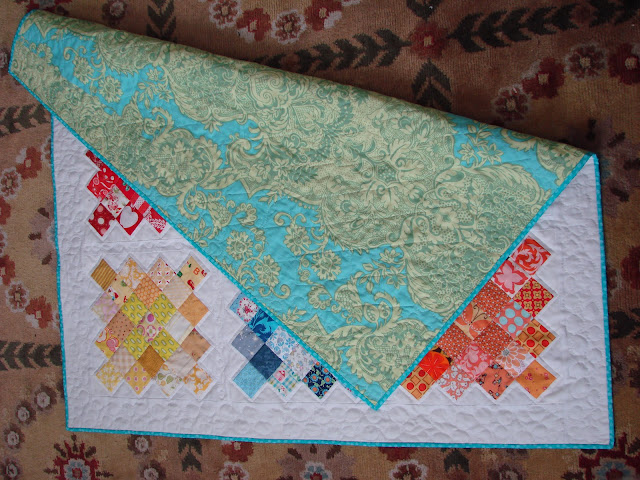
I love the back of the quilt!


See how the stitching in the ditch shows up on the back?


I love finishing a project.  I put in it various areas of the house and admire it as I walk by!  Am I weird?  lol


post signature

Jul 27, 2012

Great Granny

Hello everyone! 
 My friend Lori, is having a "Great Granny Along" on her blog,
 Bee in my Bonnet. 
 You can find part 1 here.
I had a great time making the squares, they are very addictive. 
 You just love how one block turns out and can hardly wait to get started on another!
It has also been fun looking at everyone else's blocks on flickr and on other's blogs.
Lori made 9 blocks which created a table topper.  That is exactly what I wanted to do.  I am going to machine quilt it myself and I can only manage table toppers, table runners and baby quilts.
I decided to make each of the 9 blocks a different color.
I was able to use my scraps, which to me means anything smaller than a fat quarter.
The first thing I did was cut all 25 - 2 l/2" squares.


I turned all the squares so they were on point.
I sewed the 3 squares together on a row, then the 5, then the 7, etc.


After I had sewed the blue squares in rows, I added a white rectangle to the end of each row, excluding the middle row.
I sewed the rows together to make a block, and then sewed four longer rectangles on each end, centering them.  
The block's edges now look like stairsteps.


Each block will be cut to 12 l/2", so I simply center my 12 l/2" square ruler over the block.


With my rotary cutter, I trim off all four sides, even with the ruler.


I did mine a little differently.  I chose a colorful center, and surrounded it by the same fabric print.  All the other squares in the block are different, giving my great granny a scrappy look.


I love this aqua block, the colors are so soft.  Almost every square of fabric brings back a memory.  An outfit I made for a grand daughter, a quilt, doll's dress, bag, etc.


I love the elephant that I fussy cut in the center of this pink block.


I thought the gray block was really different.  I was thrilled to have little red riding hood fussy cut for two of the squares, including the big bad wolf and a pretty tree that is in the fabric line "A Walk in the Woods".  I also love the grey houses and flowers from "Daisy Cottage" by Lori Holt who is hosting the "Great Granny Along".


I had a harder time finding enough oranges, so I had to use some 30's prints.  I really like the butterfly in the middle.


I love the red, and like the apples I was able to find in my stash.


Can you see a little baby's head in one of the squares?
I am making a baby quilt with that fabric.


The little car and elf are pieces of some Japanese fabric that I have.
Can you tell that I am reminiscing about all the fabrics I used?  lol


It was really hard to find enough purple pieces.  I had to dig into my 30's prints and civil war reproduction fabrics.


All 9 of my blocks are sewn.  I really love the fact that each one has their own color scheme, it's very colorful.  I think I was inspired my the mini granny that I made here.


On Monday, I will show you the finished table topper, sashing, quilting, binding and all :)

post signature