Showing posts with label paperdoll quilt. Show all posts

Nov 2, 2012

Paperdoll Block Embroidery, part 1

The paperdoll quilt has two paperdolls in the middle of it.  
I named mine Rebecca Louise and Lindsay Leigh after my two oldest daughters who are 16 months apart in age. Lindsay's name is red throughout the quilt with matching red initials on the tabs, and Rebecca's name is purple.


It's cute that the little bunny slippers have tabs too!


This paperdoll block has the least amount of embroidery than any of the other blocks.  The lace on the baby doll pyjamas is going to be challenging.


I embroidered the words at the bottom.


The fabric is wrinkly, I won't press it until I'm finished with the embroidery.


This is the popcorn before.....


.....and this is the popcorn embroidered.


Next week I will show you the completed block.  
Wish me luck with all that lace!
post signature

Oct 26, 2012

Paperdoll Block Applique, part 3


This is the last applique tutorial for the paperdoll block.
The red gingham piece is the cuff of a pillowcase that I appliqued.


Isn't the vintage fabric for the pillowcase cute?  There is a little, teeny white pom pom trim that is sewn between the cuff and the pillowcase.  Notice the white piece that is appliqued in the bottom left corner?  What do you think that will be?


I don't know if you can tell yet, but it is a bucket of popcorn.  It will come alive when it is embroidered.


The records, are you old enough to know what they are, or are you too young?  I traced the circles onto quilting heat resistant template plastic.  Just like making a yo yo, I ran a gathering stitch around the plastic, pulled it tight so that the seam allowance folded over the template plastic.  Then I sewed a few stitches to keep the gathering stitch from coming undone.  I took the circles to the ironing board, sprayed it with some starch and pressed them.  Then I removed the template circles and was left with perfect circles.


The circle comes out easily and the fabric pops right back into shape.


See how many times I had to make the circles and sew the gathers?


They do look like records.


I position the record under the tracing paper to make sure it is in the right spot.


All of the records are appliqued.


The next layers of the records are appliqued.


Now the third layer is added.  I wanted to show you all the steps it takes to complete on of these paperdoll blocks.  I bet you had no idea!


I added the lettering at the bottom by taping the paper pattern to my light box and tracing the writing onto the fabric.  I free handed the ribbon trim onto the baby doll pyjamas. There is some other tracing on the fabric too.  The telephone has some tracing and so does the popcorn.


Next week I will show you how the applique comes alive with embroidery.  It makes a huge difference!

post signature

Oct 19, 2012

Paperdoll Block - Applique Tutorial, part 2

This is part 2 of the tutorial, you can find part 1 here.

Now that the baby doll pyjamas, the bunny slippers and the tabs are appliqued, it is time to transfer the squiggly line for the rick rack onto the fabric.  I tape the paper pattern onto my light box and position my foundation fabric on top of the pattern so that it is perfectly lined up.


Here is the squiggly line that I traced.  It is really important to transfer all the markings perfectly, or almost perfectly :)


I glue the rick rack down with Roxanne's baste it glue.


I thread my needle with 2 strands of matching embroidery thread and stitch along every rick and every rack.  It is amazing how this simple technique makes the rick rack look just like a telephone cord.


Here is a close up of the stitch.


This is what the stitches look like on the back.


After the rick rack is glued and stitched, it is time to position the phone under the tracing paper.  When I know it is in the right spot, I glue it down with a couple of dots of glue.


Then I applique the phone using the needle turn method.


Now I position the phone receiver and glue it in place.


The phone has been appliqued!  Step by step, the block will soon be completed.


I have been showing you all of my paperdoll blocks and as I mentioned before, this is the last one.  I wanted to show you the method that they are appliqued and embroidered so that you would see how labor intensive they really are.

post signature

Oct 12, 2012

Paperdoll Block-Applique Tutorial, part 1


This is my last paperdoll block!  I am so excited to be close to finishing this quilt.  I shouldn't fool myself though because even though this is the last block, there is still lots of detail in the sashing.


The pattern comes with this drawing.
Next, I cut a piece of tracing paper to the specified size and trace the drawn images.


Freezer paper is paper on one side and a waxy finish on the other.
I trace all the pieces that are going to be appliqued, onto freezer paper, transfer the corresponding number, and cut them out.
I iron the freezer paper (the waxy side down) to the fabric, trace with a pencil, and cut out leaving a l/4" seam allowance.


Some of the applique pieces will be embroidered.  I take those pieces, remove the freezer paper, and lay them on the drawn image on my light box.  I trace the design onto the fabric and return the freezer paper to the fabric and iron back into place.  (The freezer paper can be ironed back onto fabric about 3 times)


The applique pieces are numbered in the order they need to be sewn onto the base fabric.  Piece 1 is the left tab on the baby doll pj's.  The base fabric doesn't have any markings on it.  That is why I need the tracing paper drawing.  I place the tab under the tracing paper and make sure it is centered correctly.  Then I add a drop of glue and return the tracing paper to make sure the tab is still in the correct position.  That is when I remove the freezer paper.


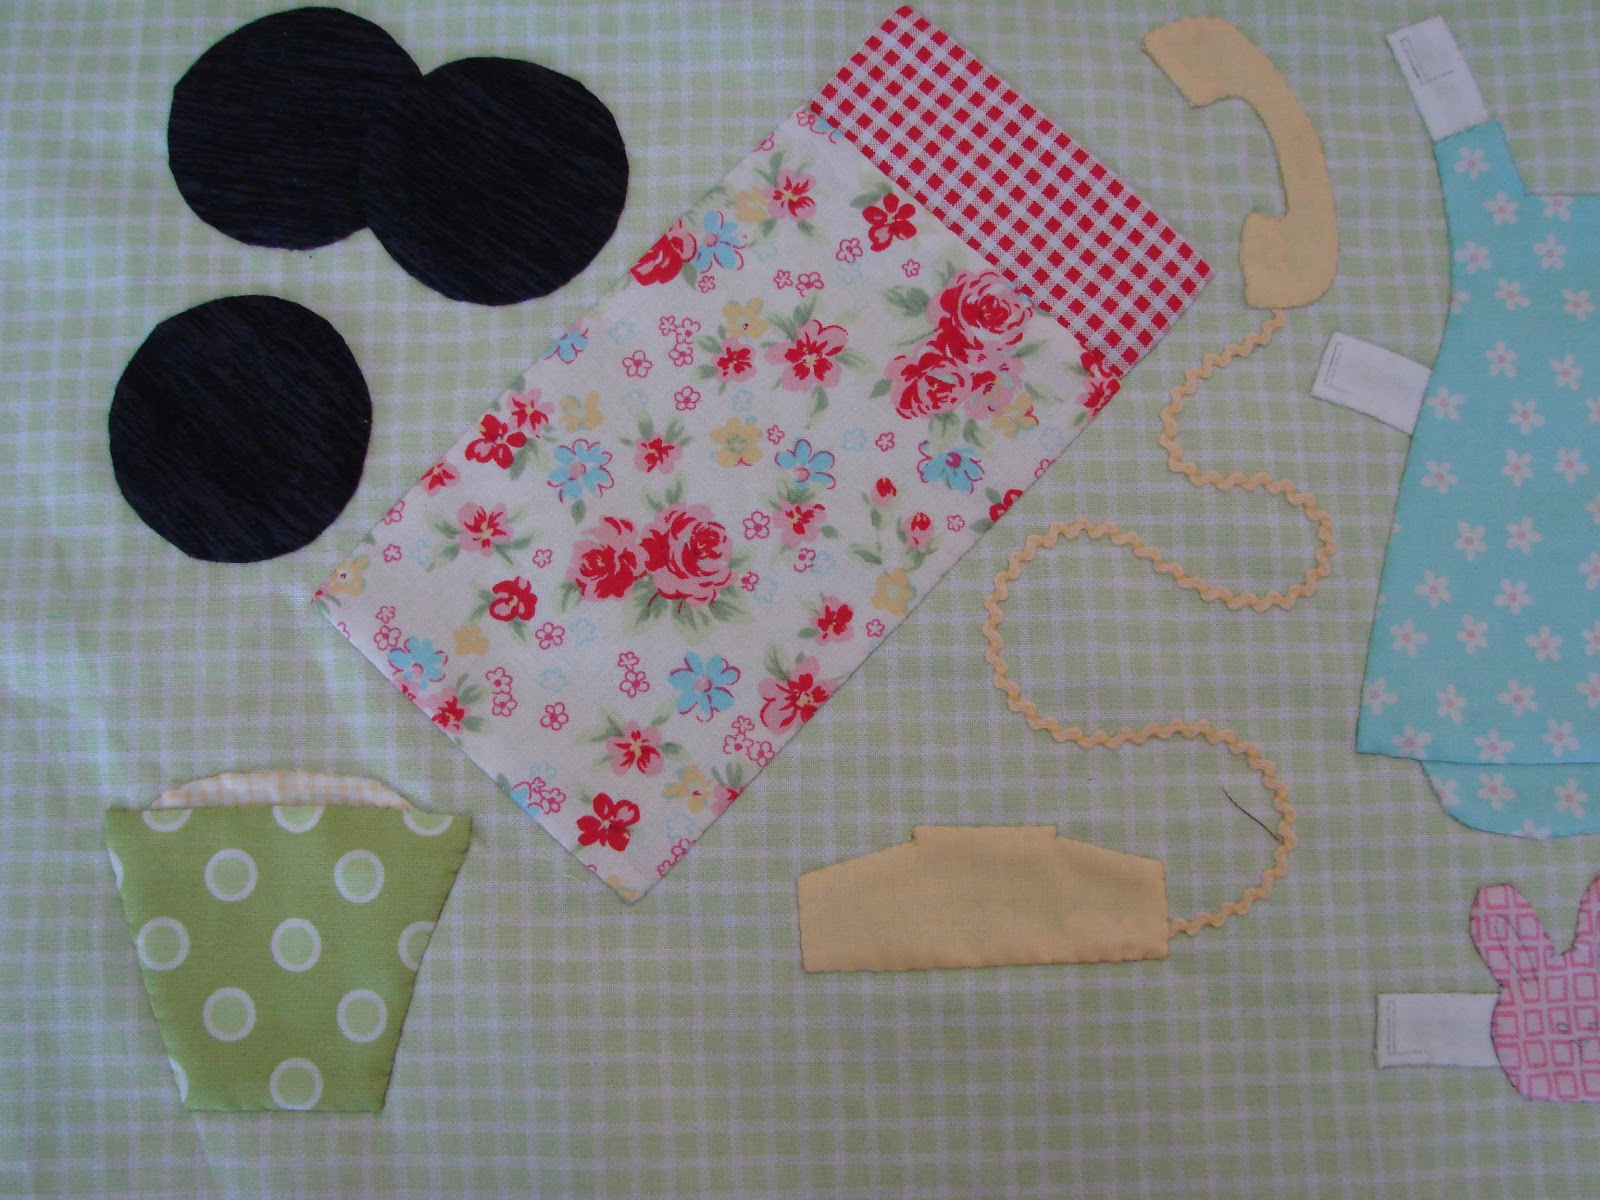
These are some of the tools I use when I applique.
Cotton thread, a needle threader, straw needles, Roxanne's glue, and a thin leaded pencil.


Using the same color thread as the tab, I stitch the tab in place.


I think the reason this method of applique is called needle turn, is because when you turn the corner while stitching, you tuck the seam allowance under with the needle as you sew.


On to piece number 2.


Piece number 2 still has the freezer paper ironed on to it.


Now I'm positioning piece number 5.


I stitched piece number 5, and have positioned piece number 6.


Stitching piece number 6.


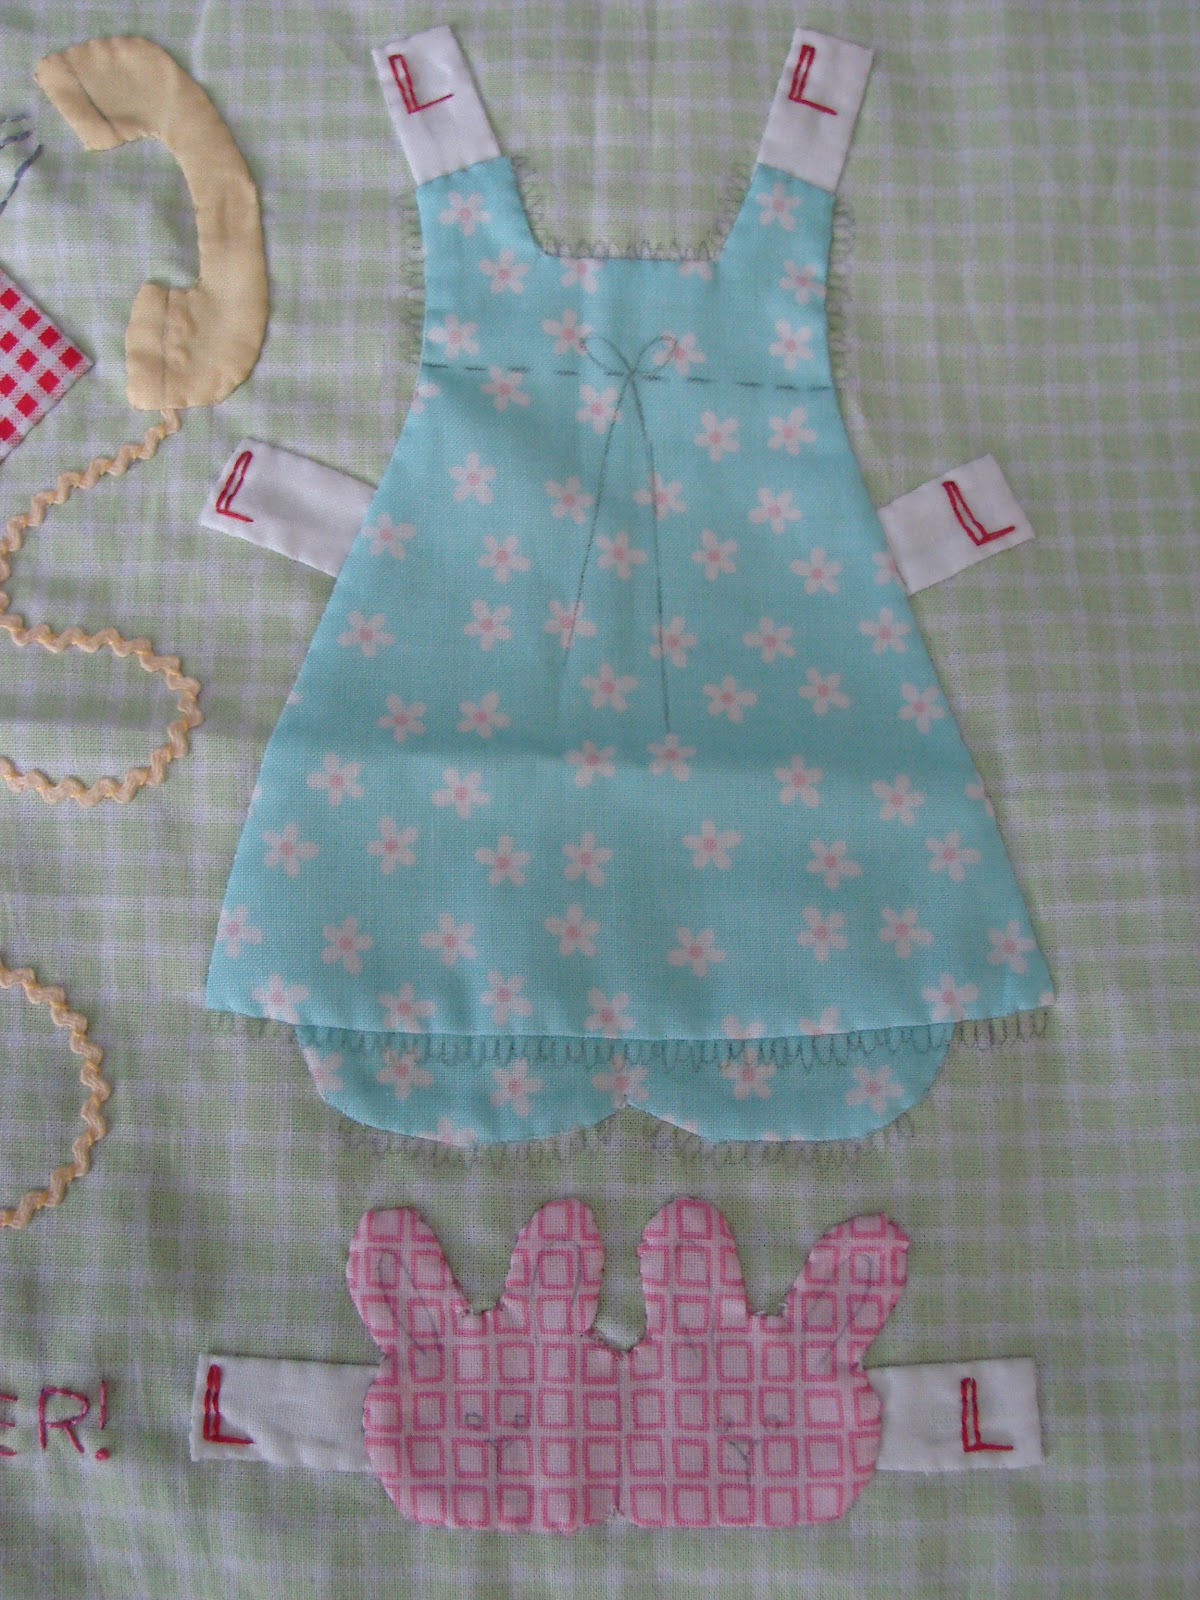
Cute little baby doll pj's. That's what they used to be called when I was a little girl in the 60's.


Piece number 7.


Piece number 8.


Piece number 9.


PJ's and bunny slippers including their tabs are all appliqued.

T
I hope you enjoy watching this block come alive!
This paperdoll quilt was designed by Lori Holt, Bee in my Bonnet,
and sewn by me :)

post signature