Jun 9, 2014

Sewing Kit and tutorial

I made my 5th sewing kit that I've made, I made my first one here with a tutorial and a giveaway.
I made the 2nd sewing kit for my son, you can see it here.
The 3rd sewing kit that I made was for a sweet young woman, and it was my most viewed post ever!
You can see it here.
The 4th one is here, I made it with a Japanese theme :)
Now to get to my latest sewing kit.
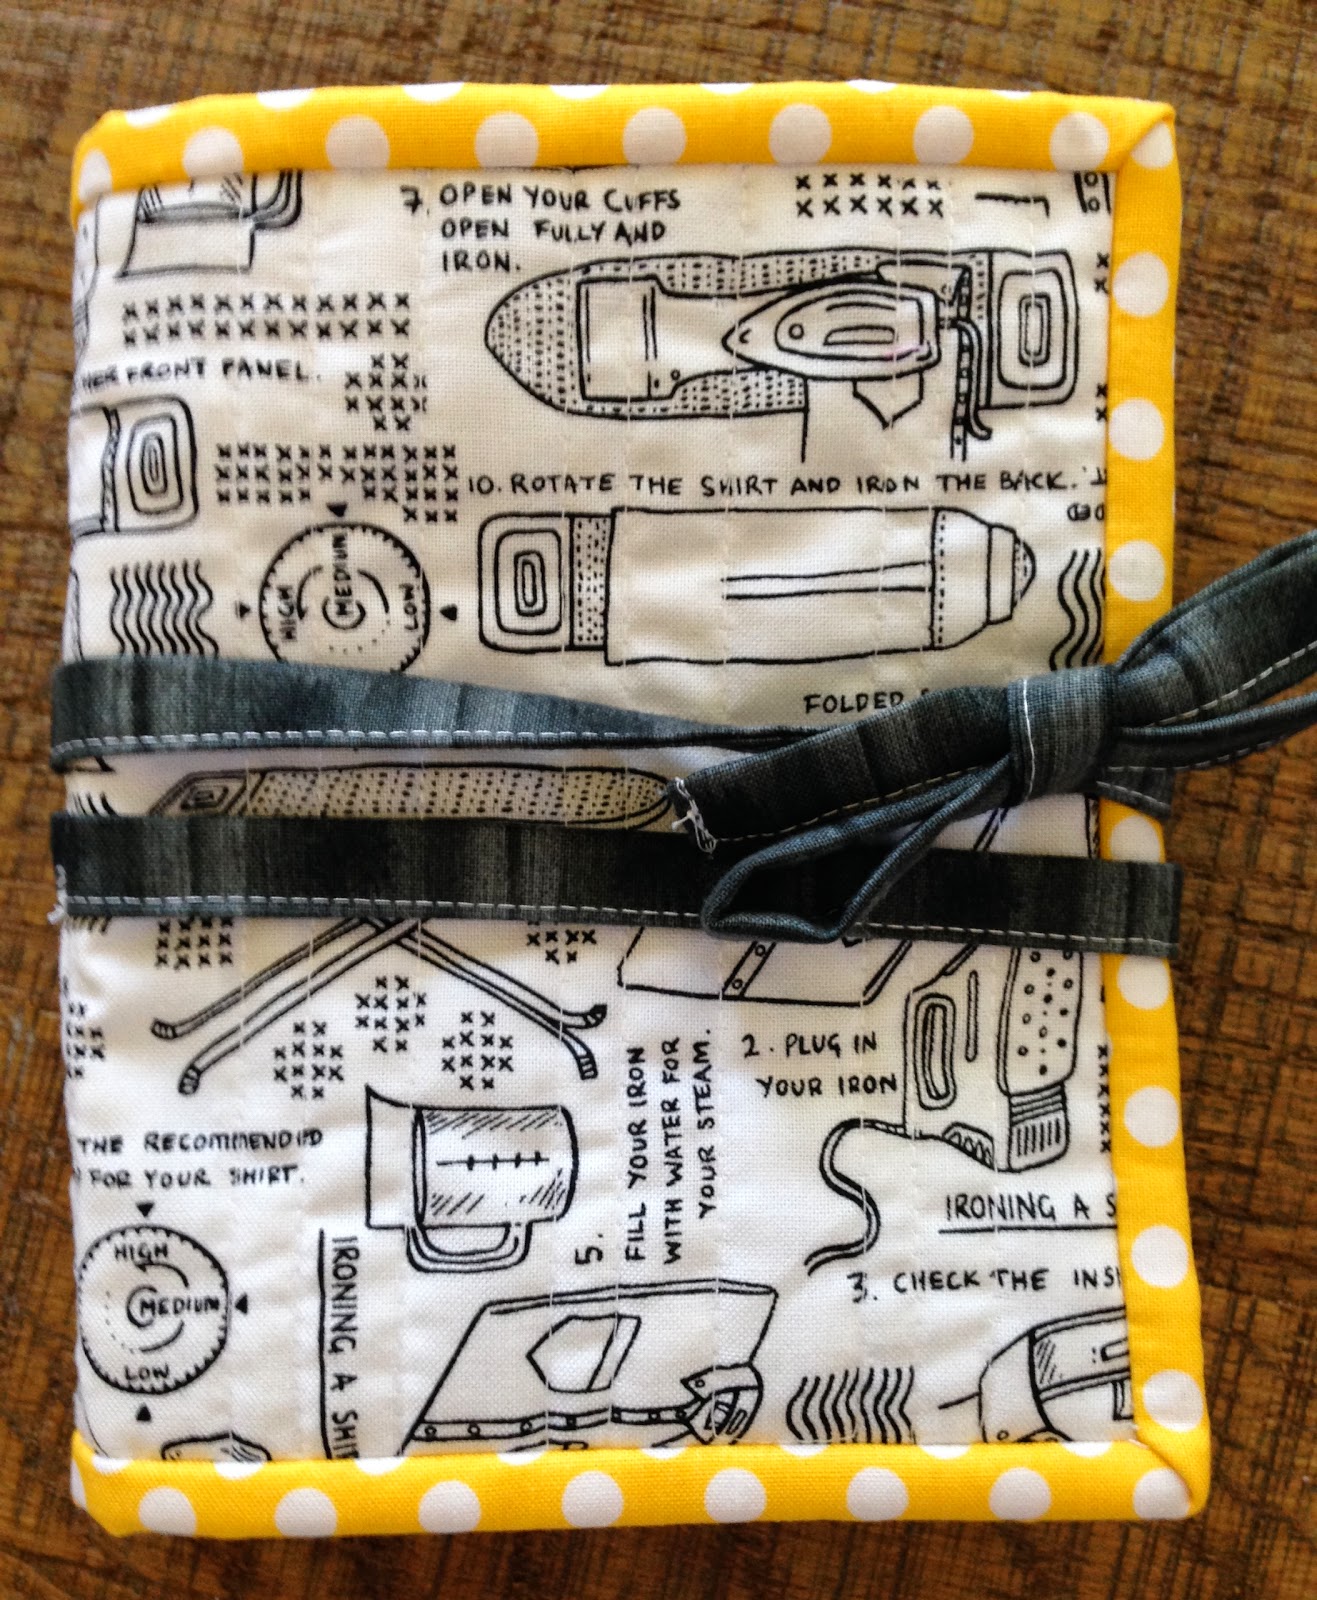
I made it for a young man who is going on his two year church mission, to Portland, Oregon.
I just love this fabric called "12 steps to iron a shirt".
It actually lists the 12 different ways and has them numbered :)
Great fabric for a missionary who will be wearing a white shirt six days out of the week!


Daniel went to BYU for a year, so this fabric was perfect!
The colors of the Oregon flag are navy and yellow, that's why I bound the sewing kit in yellow :)


Here's a better closeup of the fabric.


I stocked the sewing kit with supplies.
The pocket on the left contains iron on patches, buttons for shirts and dress pants, and some fray check.
Lots of different sizes of safety pins, straight pins and needles.
I put some washi tape on the little black scissors so they could easily be slid out of their pocket.
The pocket on the right contains clothes pins (you never know...), a tape measure and some thread with another needle.


Daniel will be an exemplary missionary, I'm looking forward to hearing about all of his experiences in Oregon.


See you in 2 year Daniel :)


Jun 6, 2014

Mini Medallion, Finished!


I finished my Mini Medallion, yay!  
I think the colors are happy and I love the Aunt Gracie prints.


I am also in love the fabric on the back :)
Little vintage girls from the 1950's.
I grew up in the day when you could only wear dresses to school.
Thankfully, by the time I reached high school, the rules had changed and you could wear pants and even jeans (gasp!) to school.


If you are interested in making a Mini Medallion designed by Corey Yoder, all the information is on my Pinterest board here.
The mini measures 24" square.

post signature

Jun 4, 2014

Dresden


I love the dresden quilt block so much!
I always thought it would be so difficult to make one, but they really aren't that hard.
I made this dresden mini, or tabletopper, for Teresa Coates, whose birthday is in May.
I'm just a little late.....
Teresa is a fellow member of our Handmade Birthday Club.
She loves neutrals, particularly grays, with a touch of butter yellow.
I chose my fabric and was able to make each petal a different print.


I appliqued the butter yellow center and safety pinned the block, in preparation for machine quilting. 


I am really excited about the background fabric, I think it sets off the grays really well :)


Ta da!  I finished the machine quilting!
I stitched in the ditch on the dresden, added a swirl in the center, and pebble quilted the background.


I always like to show off how pretty the back looks, quilted.


This is the binding all stitched onto the block, ready to hand stitch on the back.


Here's a closeup :)


Here's another closeup with a few untrimmed threads!


Yeah, it's finished!
I really want to keep it for myself, but I'll try resist the urge :)


The back could be used as a table topper too if you want a change.


I have a Pinterest board dedicated to dresdens, if you want to check it out here.
I have some tutorials on how to make a dresden block on my Pinterest board, random tutorials, but you will have to sift through a lot of other tutorials to find them :)
post signature

Jun 2, 2014

Mini Medallion, almost finished!


Please excuse the yellowish tinge to this photo, I took it at night and the light isn't very good in my sewing room.
The last time I showed you the progress of this Mini Medallion, was here.
I was so excited about finishing this mini quilt, that I forgot a step...


I forgot to sew the border before I attached the squares.
The hand picking wasn't too bad, only four short borders.
Here is the green border that I forgot to sew on.... Lol! 


Now it's in the right order!
I finished machine quilting it too, bonus!!!


A close up...
Try not to notice my chopped off friendship star points.
 I'll be keeping this quilt for myself.


I really love the vintage sewing pattern fabric on the back.
I can display this side, also.


I attached the binding and will be hand sewing it tomorrow.
This Mini Medallion quilt measures 26" square.
If you want to make one, you can find it on my Pinterest board, here.

post signature

May 30, 2014

Modern Instabee 2014 (May)


Another month, another block!
I was worried that I wouldn't have May's block done in time, but I'll mail it  today and will just make the deadline :)


Christen wanted the "triple star" block, in pink, aqua and yellow, with the background black and white, or grey and white low volume prints.
I chose really bright colors for the block, so I thought the grey "crossword puzzle" fabric would work well for the background.
I fussy cut a pretty pink flower for the center of the block.


This block is easy to sew, and it's really easy to square up because it is much larger to begin with.
My points are perfect!
A treat after I butchered the friendship stars on my mini medallion! 
Here's the first star.


Now there are two stars.


The triple star quilt block, I hope Christen likes it :)
It would be nice to have different shades of each color for variation in her quilt.
I really love the background in this block!


I never heard from Karen, I sent her the "Painter's Palette" block over a month ago, you can read about it here.
I emailed her to see if she received it and she hadn't!
Oh great, back to the drawing board.


I like the look of the colored squares with their background corners, they look like little crosses.


Luckily, it was a really fast and easy block to sew.
The colors are arranged in a different order, and I think I like this block better than the original one!


You can look on Instagram for photos of everyone else's quilt blocks. 
#moderninstabee2014
#moderninstabee2014hive11
#moderninstabeehive11

Have a great weekend :)


May 28, 2014

Mini Medallion, part 2


I am working hard to finish this little mini medallion quilt.  
It will measure 24" square.
You can find my "mini medallion" board on Pinterest here.
There are two parts to the tutorial, and this is the mini medallion that Corey Yoder designed.


I've sewn the pinwheels around the center medallion.
It was fun choosing all the 30's prints.
It was a lot of cutting and sewing!
I didn't square the half square triangles, and am really sorry that I didn't.
A lot of my points were cut off...
Luckily I'm not giving it as a gift.  
It's a fun project and I will be in a drawing to win some Aurifil thread.


Next, I will be sewing all these little squares together and onto the quilt.
This little mini quilt is so scrappy that I don't think anyone will notice my sloppy points, lol!


post signature


May 26, 2014

Great Granny Sew Along


Hi everyone, I'm back from my travels and spending time with family!
I have been sewing my heart out, trying to catch up :)
This was the block I made with the balls of yarn and crochet hook.


Greg from Grey Dogwood Studio sent me some black Pam Kitty fabric, so I made another block with a black crochet hook, instead of a green one.
You can read about that here.


I made all my Mama blocks, adding some black ones here and there for a pop of color and interest.


I trimmed the basket and balls of yarn in black, and plan to bind the quilt in black also.
I couldn't decide on a border for the quilt, there are so many colors and possibilities.
My first choice would have been the red and white polka dot that I used for the basket handle, but didn't have enough.
I chose the strawberry print that I used for the basket, and now I have a happy little quilt that I'll probably use for a table runner on my black dining room table.
I've had a great time making this quilt and seeing everyone else's pretty creations on the flickr page.
Thanks Lori, at Bee in my Bonnet.

post signature