Jun 7, 2013

Baby Girl Quilt

I have another grand daughter who we are expecting in August :)
It's always a miracle to experience being a grandmother, seeing each special little spirit and who they look like!
I bought this kit at Pine Needles about 5 years ago, I fell in love with it.  So much so, that I bought a girl kit and a boy kit.
I made the blue one for Benjamin, you can see it here.
This is what the main panel looks like without being pressed :)
I think it's so cute and vintagy!!!


Here are the lovely fabrics, there is even a white eyelet.


This is the softest minky!
It will be used for the border and the back.


Aren't these babies darling?


I cut all that fabric into l l/2" strips.


Then I sewed the strips together in pairs, some by fours.


I had lots of these combinations.


In the meantime, I fussycut the baby fabric into 4 l/2" squares.  
I barely had enough, I had to piece one of the squares.


After much measuring, cutting, sewing and pressing, I ended up with these stacks.


Here is the finished quilt top :)
I can hardly wait to bundle up my little grand daughter in this soft, snuggly quilt.  
I'll show you more photos when I get it quilted in July.


These are my favorite little blocks, "soooo sleepy" and "daddy's girl".


"Rub-a-Dub-Dub" and "Peek-a-Boo!"


This quilt is called "Marley Jane" by Remember When Pattern Co.

post signature

Jun 5, 2013

Pillow Sham Tutorial

I finished the top of my "Bee in my Bonnet Row Along", you can see it here
 I have to wait until July to get it quilted :)
I'm giving the quilt to my grand daughter to use as a bedspread.
I thought it would be nice if she had a pillow sham to match.
To fit a standard twin pillow, the measurements for a pillow sham are 27" across by 20" down.
I wanted to make the pillow sham into a patchwork of squares.
If the squares are 3" each, I would have 9 across and 7 down.
I cut each square 3 l/2" each to allow for seam allowances.
That makes a total of 63 - 3 l/2" squares to cut.


Row by row, I sewed all the squares together into a patchwork.


I traced  Neo's name onto paper and then traced the letters onto wonder under. 
 Wonder under has a paper side and a rough side.
 I traced the letters onto the paper side, making sure that the letters were backwards. 
Don't cut out the letters yet.
Then I pressed the rough side onto the fabric.
Now you can cut the letters out.
Peel off the paper, and you have some pellon glue underneath.
Lay the letters onto the patchwork and press.
The fabric will stick to the patchwork or whatever surface you press it onto.


I appliqued the letters onto the patchwork with a machine blanket stitch using contrasting thread for each letter.


I layered the patchwork with batting and a piece of white fabric, and safety pinned the "sandwich" together.
I much prefer to pin than to baste!


I machine quilted the pillow sham with a stipple stitch.
I debated whether or not to machine quilt the letters but decided against it.


I wanted to add some trim to the pillow sham so I cut 3 - 2 l/2" X WOF (width of fabric) strips of the pink fabric with yellow polka dots and joined them together as you would binding.
I added them to the pillow sham, the same method as you would use to add a border to a quilt.
 I also used the same fabric for the trim as I did for the border of the bedspread quilt.


Now for the back, it has the same measurements as the front.
I cut two pieces of white for the back to allow an overlap to fit the pillow through the pillow sham.
One piece of white is 21" X 16 l/2" and the other piece of white is 21" X 18".  That allows for seam allowances and a 4 l/2" overlap.
I pressed each end of the overlap under l/4", and then turned it under l/4" again.  I topstitched it to make a nice finished hem.
I machine basted the top and bottom of the overlap together.
I cut 3 more strips of border for the back trim, 2 l/2" X WOF.
I sewed the trim onto the overlapped back.


The front and the back of the pillow sham are finished.
Lay them on top of each other, right sides together.
Sew all the way around using a l/4" seam allowance, leaving 6" open at the bottom.
  Turn the pillow sham through the 6" hole, and press the seams flat.
I sewed in the ditch of the border, through all thicknesses.
The pillow will fit into the pillow sham, and the border will sort of be like a flat ruffle around the pillow.


The seam that I just sewed should be in the ditch on the back also.
It doesn't have to be absolutely perfect because it will never show.
Gasp!!! Did I really say that???? ha ha!


I stuck my hand under the overlap so that you can see that it is really an overlap, and not sewn together!


I laid the pillow sham at the top of the bed so that you can see how it matches the bedspread.  
The bedspread is on a queen bed and isn't quilted.
It is sized to fit a twin bed.
I have it on this bed because I don't want to fold it up and have crease lines.
I'm just storing it here until I visit my machine quilter in July, or I have some guests visiting :)


Here's the pillow sham close up.
I'm really pleased with it!  
I hope that this tutorial was clear enough to understand!
Thanks for following me :)


post signature

Jun 3, 2013

Sewing Kit Tutorial

I really love this sewing kit, I've made it twice before.
The first one I made for my son to take with him to Brazil, here it is.
The second one I made for a giveaway, you can see it here.
The original tutorial was done by Lots of Pink and you can see it on my Pinterest board of Random Tutorials :)
I made this sewing kit for Maggie, who is also going to Brazil.
I love Maggie, she's wonderful and I wanted to make something for her to take, a little piece of me :)


I hope you have enjoyed my tutorial today.
The exact measurements can be found on the link to the second sewing kit I made as a giveaway, or the link to "lots of pink".
post signature

May 31, 2013

The Quilty Barn Along #6

I'm getting the hang of making Lori's barns :)
I really like the bright colors in this block.
It's really called "sunny sunflower", but I think I'll call mine "starburst".


Both of my parents are from Prince Edward Island.
Some of my great uncles were dairy farmers and I remember how beautiful their barns were....bright red with white trim and round pole picket fences painted white with a red ring around the top.
I googled barns in Prince Edward Island and found this one.
It is located in Kings County, where a lot of my relatives are from.


I think mine is pretty close in color.
Do you notice anything wrong with this block?
I didn't at first because I was talking on the phone while I was sewing it!!!
I hung it up on the wall, sat down and then saw my mistake.....Lol


Voila, thank goodness for seam rippers :)


post signature

May 29, 2013

The Quilty Barn Along #5


This Maple Leaf block was one of my favorites from "The Farmer's Wife" quilt that I made.  Maybe because I'm Canadian and the maple leaf is Canada's national emblem :)  My favorite season was the fall, when all the maple leaves would turn red and orange.
I'm also a huge fan of maple syrup :)


I used a light blue for the background because it looks like the sky.


I looked online for some barn photos, and found these beautiful aqua ones.  I had no ideas that there were any aqua barns out there...


Here's another aqua barn.
With all the snow, I wonder if this barn might be in Quebec.

I wanted to make my own aqua barn.
I used Lori's "Polka Dot Stitches" and stitched one up.  
I'm going to look for some other colors to create my barns.
Any suggestions?


post signature

May 27, 2013

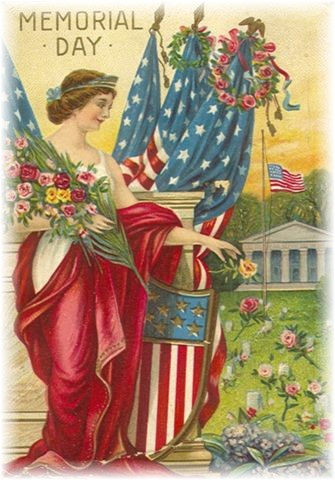
Memorial Day


Thank you to all who have and are serving in the military so that we could enjoy freedom.
A special thank you to my father in law Walter Horst who is a veteran of the Air Force and to my brother in law Greg Horst who served in the navy. 


post signature