Showing posts sorted by date for query swoon. Sort by relevance Show all posts

Nov 19, 2023

Cut and Sew Panels

I just love these cut and sew panels by Stacy  Iest Hsu for Moda fabrics

I've made almost every single one of hers and my grand daughters love them! When I saw this adorable Doggy one, I just had to buy it!!! You cut along the lines, nothing extra to add, and them sew with a 1/4" S/A

It really helps if you sew the dolls with a shorter stitch so they don't come apart.


These adorable dogs just melted my heart when I saw them!  There are four little pups in the Mom's skirt, and the Dad with his shorts and bow  tie ❤️ Love their floppy ears too!

Four little pups all in a row...

I also bought this cute shirt for my little grand daughter, keeping with the dog theme :)


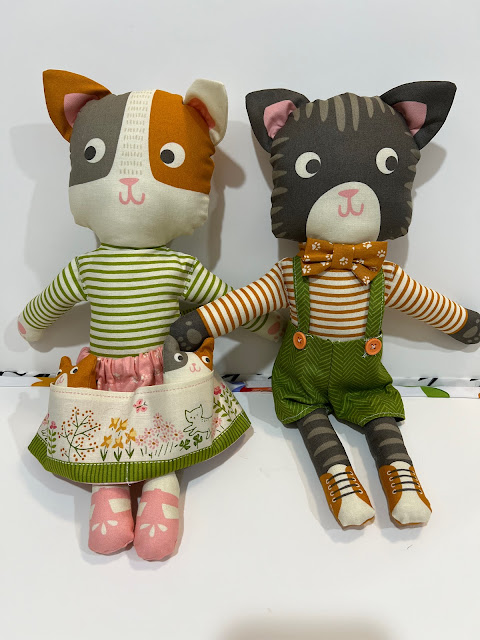
Here is the Kitty Cut and Sew Panel.
There is a whole line of fabric that goes with these panels too.  I just type the fabric line or the name of the Cut and Sew panel in the search button on Etsy and see what comes up. I try to order from a shop that has free shipping if you spend $35.00. I'd rather. spend the extra money on fabric instead of shipping :)


Swoon!!!  So cute!  I'm ordering an extra panel of the Doggy and Kitty for birthday gifts for grand daughters in the new year.


I especially love the fabric on the Kitty's skirt.  It would make a cute little girls dress or a quilt! I love the pleasant look on their faces.  ....like they're keeping a secret.....This grand daughter is getting some fuzzy pajamas to go with her little kitties ❤️


Here's the whole group!  Sew, sew cute 💗💗💗


I may have taken on too much but I'm sewing a lot of gifts this Christmas....See you next week :)

Aug 24, 2020

Christmas Swoon

I really love this quilt pattern, this is the second one I made.

The directions are very easy to follow. 

These Swoon blocks in Christmas fabric, 

were finished two and a half years ago.

Yes, two and a half years ago!!!

I wrote about them here.

The sashing was cut and the blocks were sewn, what was the hold up?

I thought I would like the quilt larger, 4 blocks across and 4 blocks down, that meant 7 more blocks?

No wonder I never finished it!

When Covid hit and we were quarantined, 

I found my quilt ready to go. 

To simplify, I decided to sew it all together, 

scratching the original idea of a bigger quilt.

Since the quilt was so large and there was so much white space,

 I had a friend machine quilt it.

( I didn't trust myself!)


I used my larger cuts of Christmas fabric for the back.

I love the pieced look and I'm using up my stash!

I'm saving all the quilts I've made this year.

They're all sitting in a neat little stack in my linen closet.

When I have fourteen of them, I'm going to let all of my grandchildren choose one, beginning from the oldest.

I don't know how they will ever choose, 

I know that I would have a difficult time :)

Feb 13, 2017

My Swoon blocks

post signature
It's the first of January, the Christmas decorations are put away, and there's some time!
Yay, some free time!
On Instagram, there are all sorts of fun ideas concerning quilting!
allpeoplequilt.com published their UFO Challenge 2017.
It was numbered 1 - 12, in a list format.
Beside each number, you wrote what quilt project you were going to finish, for that month. 
On the first of every month, all people quilt would say which number had been randomly chosen.
You would choose the project beside that number and finish it during the month.
What a great idea!
I loved all the Christmas themed posts on Instagram, and was sort of wishing I could have done a project with all my cute Cozy Christmas fabrics.
I found Mel is a Swapaholic, and she was doing a Swoon quilt along, and then I saw that Camille of Thimbleblossoms was also doing a quilt along.
I put two and two together and decided to ditch the UFO Challenge, and do the Swoon quilt along!
Here are my Swoon blocks, I tried to make them vintage looking as much as possible, the soft pinks and greens and blues, with some red thrown in.
The blocks are sewn with Cozy Christmas, but I didn't have enough, so I added some other lines.
I cut all the sashing when I cut the fabric for the blocks, so I just have to assemble the blocks together and the quilt top will be done!


Thanks for reading, I'll see you next week :)

Oct 1, 2012

"Swooning" into Autumn

Hi everyone!  I am participating in the "Fall Leafs Me Happy" Blog Hop.  The button is located on the right of my blog.
This blog hop is being hosted by Cherry, and Madame Samm who is a cheerleader for blog hops.  Thanks Madame Samm and Cherry :)
The theme of the blog hop is to make a 12 l/2" block using fall colored fabrics.
I made the "Swoon" quilt and loved making those blocks.
They were huge, 24 l/2" each.
Here is the pattern, showing off the blocks I love so much.

Image of Swoon- Pattern 142 PDF pattern

I decided to make this block for the blog hop but I had to make it half the size, converting it to a 12 l/2" block.
I call this block "Swooning into Autumn".
I chose an orange fall leaf color for the star.
Unfortunately the background color in the block is not true to life, because it is actually a sage green. 
The outside points are black (in autumn we turn our clocks back and it gets black outside very early) with green and orange dots.


This block is a little more true to color.
I added the next row.


Now the miniature "Swoon" block is complete.


I sandwiched the batting between the front and the back and safety pinned it together, preparing it for machine quilting.


I shadow quilted the star, with a l/4" stitch, and stitched in the ditch on the rest of the block.  
I used an eggplant mini check for the binding.
I thought of black, but the eggplant colored binding made the colors in the block "pop".


Here is my finished block.
"Swooning into Autumn".


Here is the back of the quilt.
I love this fabric.  Hallowe'en always means "fall" to me :)
I had to be careful with the quilting so that it wouldn't take away from the print on the back.


Here is a list of the other blogs that are participating in the
 "Fall Leafs Me Happy Blog Hop" today.
Visit them and leave a comment!


I hope you have enjoyed my tutorial today.


I have really enjoyed making this block and being part of this blog hop.
For more information all the other blogs that are participating through October 10, click on the "Fall Leafs Me Happy" button to the right of my blog.

post signature

Jul 18, 2012

Binding Tutorial, Part 1

I like to cut my binding strips 2" wide for double-fold binding.
I like this size because finished double-fold binding sews on smoothly with a l/4" seam allowance, hugs the edge of the quilt, makes a neat miter fold, and covers all stitching when it is turned over the edge of the quilt. 
Many quilt patterns call for a 2 l/2" wide binding, but my preference is 2". DON'T cut your binding on the bias unless it will be going around a curve.

If you have a smartphone, Robert Kaufman has a great app for calculating the yardage needed for the binding on your quilt. 
It is better known as The Quilters Little Helper.
All you do is add the dimensions of your quilt and the width of your binding and the app will calculate exactly how much yardage you need for your binding.  It provides lots of other calculations as well!

Here is my mini granny mini quilt. I posted about his quilt here.


Since the mini quilt is so small, it wasn't a bother to hand quilt around the mini granny squares.  I have always loved this look and decided to use embroidery thread that matched the color of each square.  I used DMC floche.  The cotton thread has a lovely, silky feel to it.  I always use this thread when I smock.  
I thought about machine quilting inside each square, but the blocks are so little they don't really need it.  It might also detract from the hand quilting.


Cut off the excess batting and backing, flush with the quilt front.


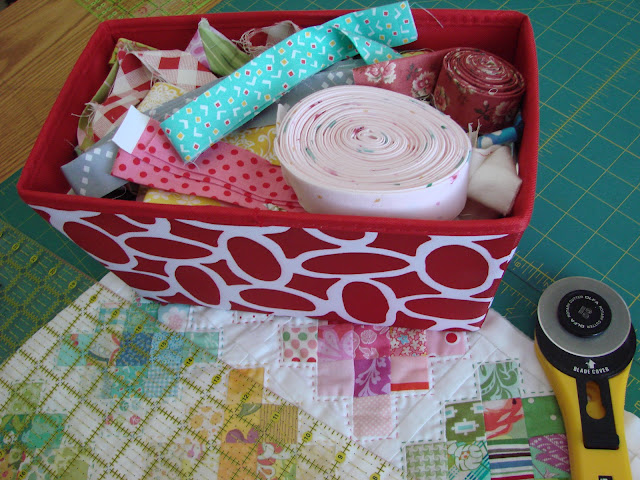
Whenever I attach binding to my quilt, there is always some leftover.  When I was making my Swoon quilt, I pre sewed the binding.  When the quilt was quilted and ready to be bound, I changed my mind and used another fabric for the binding.  I save all my bits of binding, some longer than others.  I'm just going to pick some bright colors out of my binding basket and sew a scrappy binding.


I think these ones will look fabulous!


Now I need to join my binding pieces together.  I would do this even if I were using 45" long strips of the same color.  
Place two strips right sides together, crossing the ends at right angles, leaving a l/4" overlap on two sides.


Sew a straight line from point to point.


Trim the seam to l/4".


Press the seam open.


Now fold your binding in half, wrong sides together.


I sewed all my binding strips together, pressed the seams open and folded them in half and pressed again.


Avoid starting to sew the binding exactly in the middle of a quilt edge.  Each time you fold your quilt in half, it will weaken at that spot.  This is a mini quilt (15" X 15") so that rule doesn't apply.

Don't pin the binding to the entire quilt before sewing.  As you sew, the binding may "bubble up" between the pins and cause little tucks. 

As you sew, concentrate on the 3" of binding directly in front of the sewing machine needle.  Lay the first 3" in position and sew, then go on to the next 3".  Before long, these 3" lengths will add up to the entire quilt!

Place one end of the binding 6" from one of the corners.  Align the cut edges of the binding strip with the cut edges of the quilt.  Start sewing 4" from the beginning of the binding. 


 Use a l/4" seam allowance, there is no need to backstitch when you begin to attach the binding.


A straight pin will help you mark the place l/4" away from the edge, to stop stitching.  


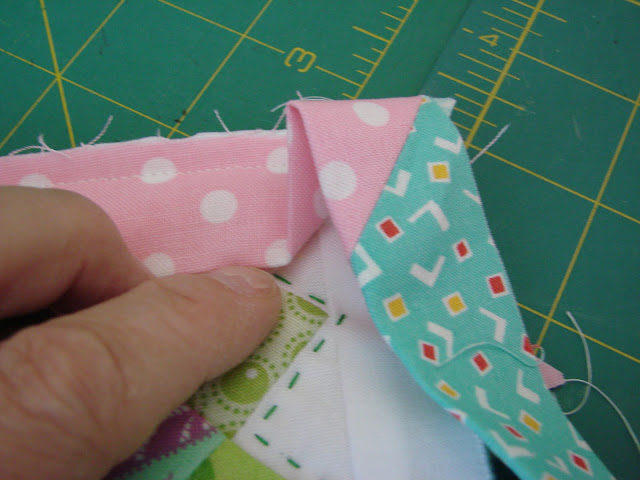
Fold the binding so that it extends straight up from the second edge of the quilt.  You'll be creating a diagonal fold, which will create the miter. 


Fold the binding down, aligning it with the second edge of the quilt. The fold should be even with the first edge of the quilt.  


Sew the binding to the quilt from the top, using a l/4" seam allowance.


Repeat these steps for the remaining corners on your quilt.


Stop sewing the binding approximately 6" away from the starting point.  


Cut the end of your binding with a perpendicular cut so that it overlaps the beginning end of your binding.  The length of the overlap must equal the width of your binding strip.  I use a 2" overlap for 2" wide binding.  You would have a 2 l/2" overlap for 2 l/2" binding, etc.  


There is a 2" overlap, because my binding is 2" wide.


Open the folds of the two strips and overlap them at right angles with right sides together as shown.  Pin them together.  Draw a diagonal line between the two points where the binding strips intersect as shown. (I've done this so many times that I don't draw the line anymore)


Here is a diagram that might better illustrate the directions.  


Sew the ends together on the marked line (from point to point).


Trim the seam to l/4".


Press the seam open.


Refold the seamed section of the strip, return it to the edge of the quilt.


Finish sewing the binding in place, it is a perfect fit!


Trim all the threads from your corners and the little triangle bits.


Congratulations, you are now ready to sew the binding onto the back of the quilt.


I will share that with you in Part 2, Friday's post.


post signature