Jul 16, 2012

Kindle Fire Cover

My son in law won a "kindle fire" at work, and I made a cover for it.  Have you ever tried to choose "masculine" fabric at the quilt store?  lol.......It is possible!
I found the tutorial here, on Skip to my Lou's blog.

The directions were very simple to follow.  It called for white elastic to hold the kindle in place. I kept the elastic in the top left corner to show you what it looked like.  I didn't really like the look, so I purchased some black elastic instead.
Do you like the "masculine fabric"?  I really like the chevron!


I cut a piece of cardstock the dimensions of the kindle to make sure it will fit in the corner elastic holders.


I chose this pattern, because of the pockets.  Two full depth pockets on the front, and one on the side.


I used the chevron print for the tab and sewed on some navy velcro.  Unfortunately I wasn't able to find any brown.


I looked into my button jars and found a really nice vintage one to finish the look. 
I'm pleased with the results.  I hope he likes it!


post signature

Jul 13, 2012

Peppermint Pizzaz

Peppermint Pizzaz is a 43" X 43" table topper by Cotton Way.
The cutting instructions are simple, as well as the sewing instructions.  Because of the pinwheel stars and flying geese, I would call this an "intermediate" level pattern.  I enjoyed sewing it, but am not pleased with the colors I chose.


I love the fabrics in the peppermints, they are from the Vintage Modern line, designed by Bonnie and Camille.

The peppermint sticks were supposed to be sewn a different way.  The pattern says to cut six strips of fabric, sew them together, and then cut them on the diagonal for the peppermint sticks, with skinny borders around them.  I thought the red and white striped Vintage Modern fabric with little polka dots was perfect for the peppermint sticks, so I just cut the fabric into peppermint shapes instead of using the method stated in the pattern.  
I prefer the peppermint sticks in the pattern, versus mine!


The star quilt block is one of my favorites, and I especially like this one with the pinwheels in the middle :)  
The fabrics I chose for my table topper are much too faint.  
There should be some popping of color going on.....some rich reds.
I like my background compared to the one in the pattern, it is from the Ruby line.


It took a lot of sewing hours to finish this table topper.  Too many just to have it sit on the kitchen table.  
It would make a pretty wall hanging but I don't really need one.
I'm really not that thrilled with the results, mainly because of the colors (or lack of color) of the stars.
I have a confession.......as I was sewing the rows of the table topper together, I was watching TV. I guess I wasn't paying attention and sewed the rows together without the sashing. Ugh! I had to do a lot of seam ripping......ouch!

I still need to purchase some fabric for the back so that I can machine quilt it, and will show you the finished product.
Did I mention that I'm teaching this class at the quilt shop?


post signature

Jul 11, 2012

Modern Vintage

I think this is the coolest story of two Moms (mother and daughter) who share the love of sewing and the look and feel of fabric. 
 My mom taught me how to sew when I was a young girl. 
This photo was taken of my mom and I, about six weeks ago :)


 For a very small amount of money (fabric used to be inexpensive), I could make a beautiful pants suit.  Yes, they used to be in style!
I remember one particular pants suit....the fabric was thin for the hot, humid Montreal summer.  Pink with small flowers, similar to a Liberty of London print.  I made the pants with wide legs (elephant pants in the 70's) and sewed a simple elastic waistband.  The matching top was a mini dress length with a scoop neck and big puffy sleeves.  I loved that outfit, it made me feel very fancy! lol..... I was 13 years old.

Forty years ago, my mom made my youngest brother Paul, who was four years old, a quiet book.  She only finished 2 l/2 pages.
Here they are....


A hippopotamus with a lot of personality....unbutton his mouth,


An elephant wearing rollerskates that unbutton with an elastic loop.
Do these calico prints from the 70's bring back any memories for anybody?


The yarn was sewn on a strip of fabric for the lion's mane, and the body and head were cut out and embroidered.  I had a terrible time trying to turn the fabric tail inside out, so I just bought some cord and braided it.  I sewed the body pieces to the fabric and stitched down the ribbon. I used the blanket stitch on my machine.  ROAR!!!


I made the turtle myself, I love the way he turned out.  The fabric is very thick and soft, just like a real turtle!  lol  The flowers were made out of craft foam and his eye is a "googly eye" button.


Don't you just love his "puffy" little heart?  
I sewed the snaps on with a double thread, but the thread kept breaking.  I used quilting thread, and it still broke!  Finally, I tried buttonhole thread and it was the strongest, it didn't break.  The large  snaps are really easy to open and close.


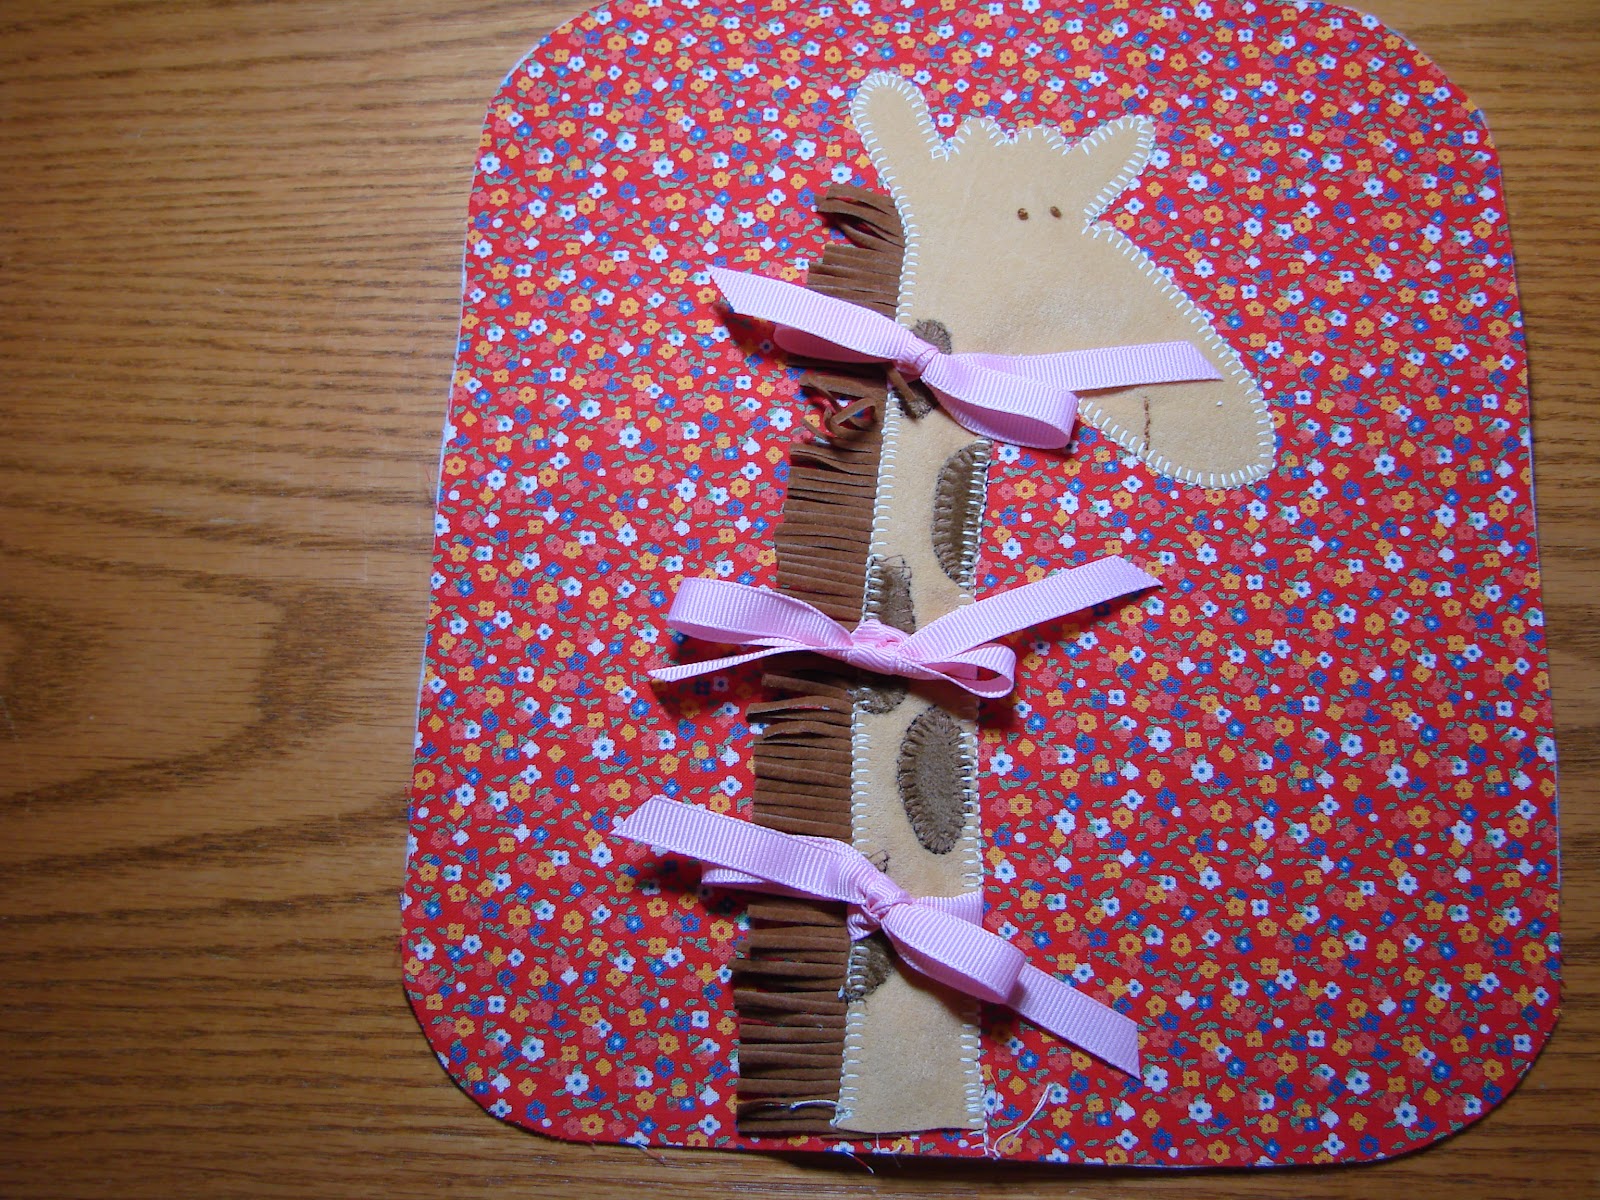
I thought that purchasing trim was much easier than trying to make the giraffe's mane out of yarn.  I used grosgrain ribbon for the ties because it is stronger and doesn't fray if cut on the bias.


Out of all the pages in the book, this turquoise polka dot fabric is the only one that is modern, and not vintage.
I used decor weight (heavy) iron on pellon for the backing of each page.  The letters are backed in the interfacing, and I just stitched around each letter with a raw edge.  I sewed on teeny little buttons for the dots on the "i"s.


I made the book for my grand daughter Maisie's birthday.  She just turned two.  
I just think it is so cool that this quiet book is Modern Vintage.
It was started 40 years ago and finished for my grand daughter.
I hope she will appreciate it when she gets older and can pass it down to one of her children.


Maisie makes the funniest faces, she is a character!  She is also a parrot, she repeats everything you say.  Her mom says she has to be very careful what she says......lol 
I think Maisie may be thinking, "Grammy, are you serious?"
"You chose me to give the modern vintage book to?"

Here is the finished book, grommets and all.


I hope she likes it ♥ dirty face and all!


THE END


post signature

Jul 9, 2012

Girl's Night, the results!


We had our girl's night at Rebecca's house.


Rebecca has a 2 year old daughter named Maisie, and a baby boy  due at the end of October ♥.


Lindsay came.....


.....she has three children, Bridger is 7, going into first grade, Kennedy is almost 5, going into Kindergarten, and Charlotte is 2.


....and Kimalee came,


Kim has a 20 month old daughter named Reagan.


Unfortunately, Mabulane and Vanessa weren't able to make it.

Everyone chose their color combos that I had precut, and I showed them the project.  We made the lunch bag tutorial by Ayumi, from the Pink Penguin blog. This was one of the first projects that I pinned ("random tutorial" board) when I first started Pinterest.  I have wanted to make this bag for a long time!  Ayumi did an excellent job with her photographs and directions.

We did a lot of sewing......


And a lot of pressing......


After about 3 hours, we were finished!


I bought this Amy Butler fabric at the last minute, because I thought I was minus one kit.  Aren't the colors beautiful?  Unfortunately I forgot to take a closeup.  I liked the fabric so much that I bought more to take home and make another bag :)


Lindsay chose the cute pink gingham elephants, with yellow fabric and pink polka dots.  Reminds me of bubble gum!  (I don't know why!!!)  It is so cute.


I love Kim's too!  She chose the yellow Japanese print, with an alphabet cover.  I always like red fabric with white polka dots.  It is adorable.


I love this bright pink fabric with flowers, and I have the same cover as Lindsay's, the yellow with pink polka dots.


We had a great time and it was fun to complete a project in one evening.


I took some pictures of my bag during the day, with better light.


Notice the word "hope" on the handle?


The inside of the bag itself is completely lined.


The bag opens up nice and wide at the top.  You can use the bag to carry your embroidery with you, your hexagons that you are handstitching during children's soccer practices (ha ha!), and Lindsaymy suggested using it as a makeup bag. There are so many things you could use the bag for.
I hope I have inspired you to make one of these bags, they were a lot of fun to make.  It would make a great gift too!


post signature