Showing posts sorted by relevance for query swoon. Sort by date Show all posts

Nov 19, 2023

Cut and Sew Panels

I just love these cut and sew panels by Stacy  Iest Hsu for Moda fabrics

I've made almost every single one of hers and my grand daughters love them! When I saw this adorable Doggy one, I just had to buy it!!! You cut along the lines, nothing extra to add, and them sew with a 1/4" S/A

It really helps if you sew the dolls with a shorter stitch so they don't come apart.


These adorable dogs just melted my heart when I saw them!  There are four little pups in the Mom's skirt, and the Dad with his shorts and bow  tie ❤️ Love their floppy ears too!

Four little pups all in a row...

I also bought this cute shirt for my little grand daughter, keeping with the dog theme :)


Here is the Kitty Cut and Sew Panel.
There is a whole line of fabric that goes with these panels too.  I just type the fabric line or the name of the Cut and Sew panel in the search button on Etsy and see what comes up. I try to order from a shop that has free shipping if you spend $35.00. I'd rather. spend the extra money on fabric instead of shipping :)


Swoon!!!  So cute!  I'm ordering an extra panel of the Doggy and Kitty for birthday gifts for grand daughters in the new year.


I especially love the fabric on the Kitty's skirt.  It would make a cute little girls dress or a quilt! I love the pleasant look on their faces.  ....like they're keeping a secret.....This grand daughter is getting some fuzzy pajamas to go with her little kitties ❤️


Here's the whole group!  Sew, sew cute 💗💗💗


I may have taken on too much but I'm sewing a lot of gifts this Christmas....See you next week :)

Jun 27, 2012

Mini Granny

I have been dying to make a granny quilt but haven't had the time.  Instead, I made a mini granny table topper.  I have a large Ikea box with small scraps and another large box with large scraps.  Not to mention all the other fabric I have, but right now I will concentrate on my scrap boxes....lol!  I rummaged through my box of small scraps and cut l l/2" squares of reds, pinks, blues, greens and yellows.  I wanted  an  orange block but unfortunately, I don't have many orange scraps.


It takes 26 squares of colored fabric for each block, and 25 squares of white.


I love my design boards, I really really love them!  I used the tutorial from Lori's blog.  I also made two large ones which I use a lot too.


I think I only had to duplicate one print, I have a lot of scraps!!!


There is something so satisfying about cutting pretty fabrics and sewing them up, especially in miniature!


Something else I find very satisfying while I'm cutting and sewing, is chocolate :)


.....and more chocolate, until.......


.....all the chocolate is gone!  Yes, this bag of m & m's was my friend while I constructed this mini granny.


Yeah, all of my blocks are done, little mini 6 " blocks.  They are so cute and I enjoy looking at each and every print and remembering what I used them for.  Kennedy's dress, Lindsay's bag, Comforts of Home quilt, Christmas table topper, rainbow charm pack swap, swoon quilt, Rebecca's quilt, the farmer's wife quilt, Bridger's baby wall hanging, and on and on and on......the journey of a quilter :)


It almost looks like lace, doesn't it?  Now I am going to trim the blocks, leaving a l/4" seam allowance on all four sides.


This is my larger design board.  I love it and I use it a lot!
Now the blocks are ready to be attached using l " sashing.
I see more memories in the squares :) 


The quilt is pinned and ready to quilt.  I am going to hand quilt it, so it may be a while before I finish it as I have so many projects going at the same time, and I keep adding new ones.  I will get everything finished, it makes life more interesting when there are so many things to work on :) 
I am going to hand quilt this little table topper (25" square) with colored embroidery thread to match each block, in an outline stitch.
I love it, it's really colorful and happy!
By the way, I didn't make a dent in my box of small scraps...lol

post signature

Mar 20, 2012

Doll Class

Katie asked me to teach a doll dress class at her quilt shop.  We picked out the fabric and the pattern and I took it home to sew.


p0186 

The pattern was pretty easy to sew, because the pattern pieces were all rectangles.  There weren't any little armholes to fuss with, or facings on a curve.  I would recommend this pattern, but it would still be helpful to have some sewing experience.


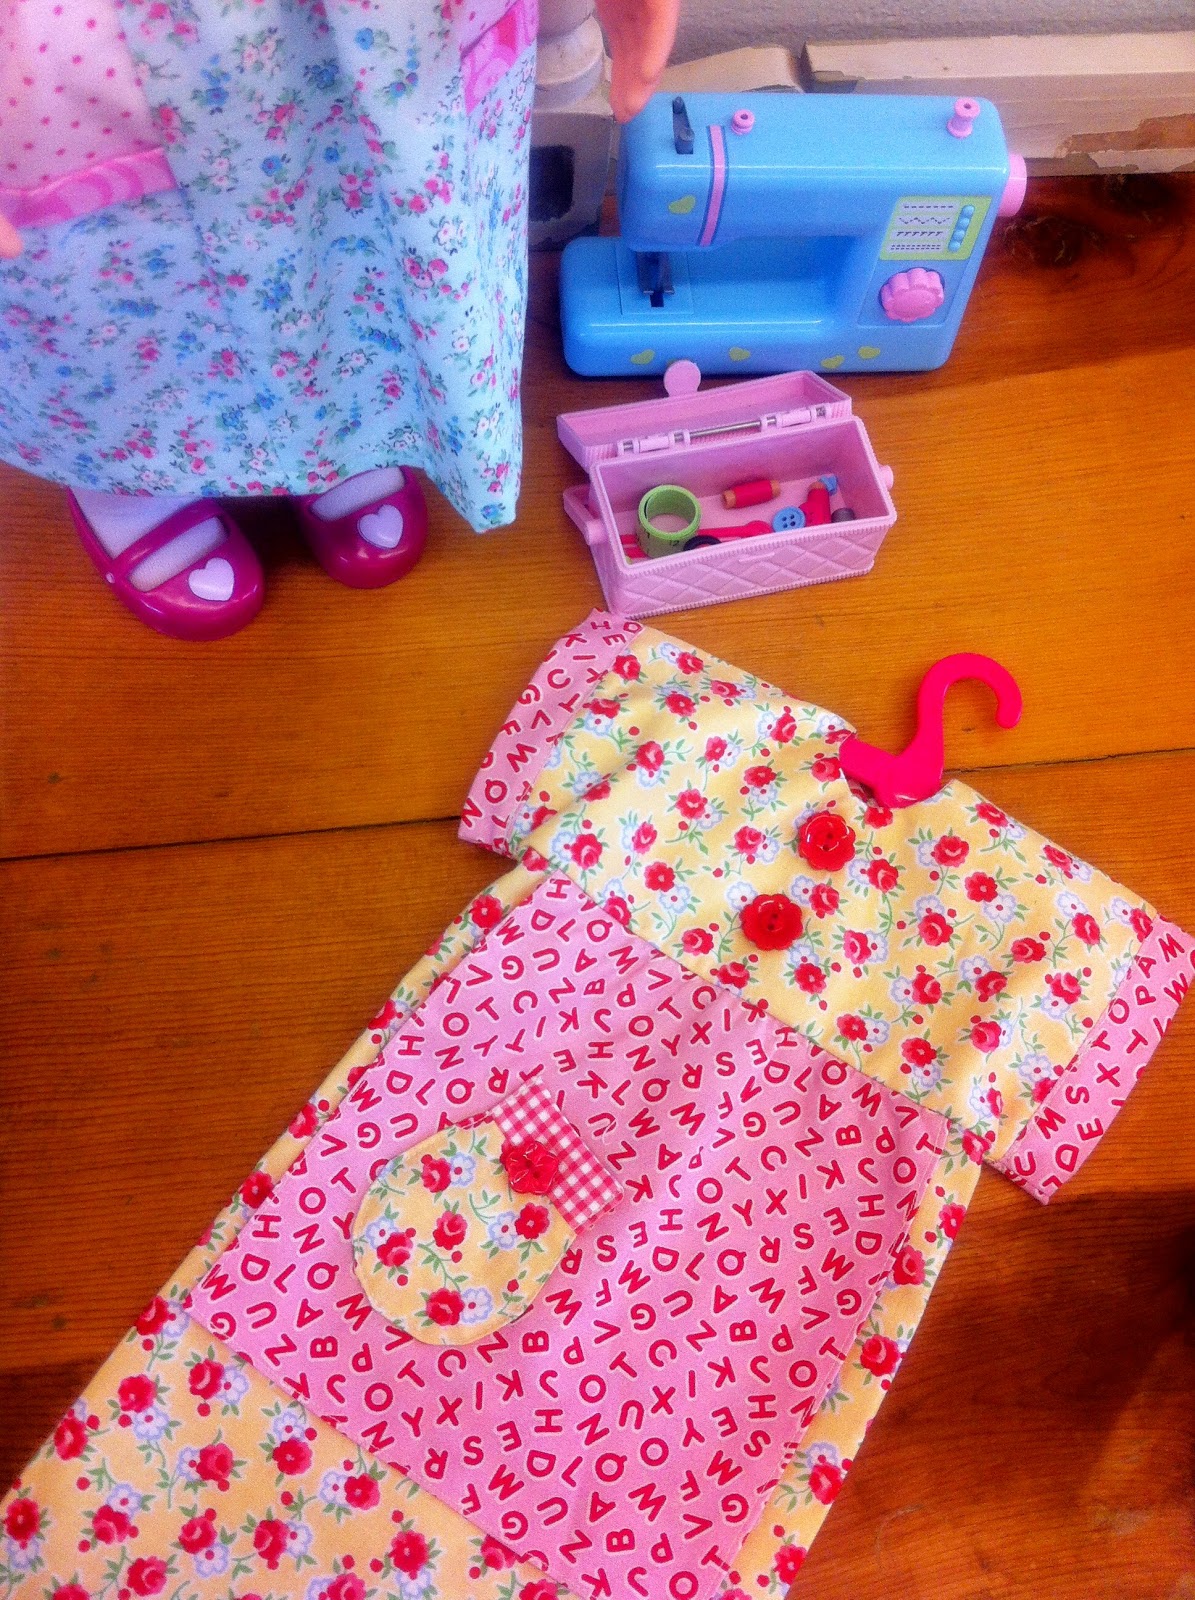
This dress is the one pictured on the righ,t on the pattern envelope.  The pockets were so easy to sew with the rectangle pieces, and they are self lined.  The neck lining is one big rectangle, the size of the little dot fabric in the center of the dress.  You sew a square in the middle, trim the l/4" seam allowance, turn inside out, press and you have your neck opening.  The only thing is, the doll's head won't fit through the hole.  When you are finished sewing the dress, you cut the dress down the back and  press the seams back l/4".
You then sew velcro along the back, enclosing the l/4" seam and your dress is finished!


I really like this dress also.  It was even easier to sew.  I made a mistake though. Notice that the skirt seams straight.  Well I attached the skirt front and back pieces the wrong direction.  The dress should be shorter and have more gathers.  The diagram on the pattern shows you to attach the skirt rectangle this way and  there are no dimensions to tell you otherwise.  Being an experienced sewer, I should have known better.  That is why everyone needs a seam ripper.  I haven't changed it yet but I will. The pocket was so easy to put together.  You start with a square of yellow fabric.  You sew a red gingham rectangle onto the top , creating a rectangle.  Take another rectangle the same size and lay them together.  Sew the pocket shape all the way around, without an opening.  Cut a little slit on the back of the pocket.  Turn in right side out.  Press and topstitch the pocket onto the apron!  So, so easy....

This is the advertisement for the class that Katie posted on her blog.


via sew katie jean by katie jean on 3/7/12

This Saturday, March 10, Sew Katie Jean is having a class to teach you how to sew dresses for your 18" doll (American Girl).


Cynthia Horst is teaching that day.  And you will learn to sew 2 different dresses from the Rectangle Dress for Dolls Pattern.


This would just be the funnest class to take with you own girl who is just beginning to sew.  Make a memory together or just surprise her on her birthday or at Christmastime!  She would love it.


The doll featured in these pictures is one that I just bought at Target for display at my shop.  They also had these sewing accessories for $23.  I just had to buy it with the sewing machine, wrist pincushion, and sewing box.  Plus just look at the little hearts on her shoes!  I bet you would like it just for yourself....


Saturday, March 10
1:00 - 3:30 p.m.
$25.00
teacher: Cynthia Horst

Call {916} 209-3930 or stop in to register.


This mom and daughter were darling.  We all learned that her daughter loves to iron. Every chance she got, she would run to the ironing board!  Even her mother didn't know that little tidbit of information.  The mom said she would definately get some ironing for her daughter to do at home.  They had to leave a little early because the little girl had a daddy daughter date later that evening.


This mom and daughter had a wonderful time too.  It was really fun watching the girls walk around the shop and choosing their fabric.  The girls were so excited to create a dress for their dolls.


This is a grandmother/grandaughter team, they were a lot of fun.  The grandmother kept cracking jokes, and she was a wonderful mentor, teaching her grandaughter how to sew.


She was so proud of her creation.  She especially liked the candy fabric she chose for the trim on the pockets.  I used the pink fabric in one of the squares on my Swoon quilt.


This little girl thought to bring her doll to model the new dress.  She is so happy!!

We really had a great time in this class. The girls were so excited to create an outfit for their dolls, and learn how to sew and press at the same time.
post signature