Mar 4, 2013

Progress!

It's midnight and I have finished Benjamin's blessing shirt.
I am so excited that I have this much done!
I just have to make the lined knickers and sew about 14 button and buttonholes!!!
I blocked the smocking insert.


I cut the bias strips to sew the piping.


Here is a close up of the shirt.
There is piping around the collar, the top and bottom of the smocked insert, and the sleeve cuffs.
I sewed the buttons under the ducks, aren't they cute?
I really like the knife pleats too, they add a masculine touch.


On Tuesday, I will sew the lined knickers andhopefully sew all the buttonholes.  See you then!


post signature

Mar 1, 2013

What I'd Rather Be Doing.....

I have been wondering what to post about...
There are so many fun sewing things I want to be doing, but can't right now.

I want to sew "sewing baskets", Row 12 of the Bee in my Bonnet Row Along...


I want to sew the Quilty Barn Along from Bee in my Bonnet.


I want to sew the Scrappy Trip Around the World that I've seen all over Instagram...


I've even been tempted by the Medallion Along I've seen on Instagram.  It's based on a pattern in this book "Liberty Love", by Alexia Abegg.


Di at Random Thoughts blogged about her compulsion to join other's quilt alongs.  I think I have the same problem, I just can't resist!  They are always so attractive!!!

This is the Medallion block.


Instead, I am doing something very important....
something that can't be put on hold...
something that will hopefully be passed down from generation to generation...

I'm sewing a blessing outfit for my grandson, Benjamin :)


I am smocking him an old fashioned button on suit, I posted about it here.  It will be white with off white piping and off white smocking.
I will be constructing it next week, the blessing is March 10.
(I procrastinated a little...)

Then, I will be smocking a blessing gown, bonnet and slip for my grandaughter,  Kylie.

I will make it as old fashioned and luxurious as I can!  
Kylie's gown will be off white with peach silk satin ribbon ties.

I will post more photos next week, thanks for following along :)


post signature

Feb 27, 2013

The Quilter's Little Helper

I found this app for my iphone and ipad, and it's free!
It's free for android phones as well.


It is a quilt calculator.

It tells you:

Fabric Measurement
Backing and Batting
Piece Count
Pieces to Yardage Area
Binding
Border Yardage
Square-in-a-Square
Set-in and Corner Triangle

I always use the "binding" calculator when I make a quilt. 
I cut my binding 2" wide and this app tells me how much yardage I need to buy for the binding and how many strips I need to cut.
I would recommend that you take a look at it, it's FREE :)

post signature


Feb 25, 2013

Smocking

I am making my little grandson a blessing outfit.
I'm making the button on suit with the pleated front and knickers.


This is my pleater.
For this project, I threaded 10 needles.


Some of my little dowels that hold the spools of thread have broken over the years, but I can still get it to work :)


I rolled my length of Swiss Cotton onto a dowel and gently pulled it through the pleater.  


It's so easy to break a needle when I do this, so when I say I pull the fabric through gently, I mean it.
If I break a needle, I have to take the whole thing apart and start all over again.  I've done that many times, and it is a pain!


Yay, I didn't break a needle and the pleating is straight.


I smocked 2 rows on the top and 2 rows on the bottom.


I want the pleats to hold their shape in the front, so I had to back smock 4 rows on the back of the inset.


I finished the little ducks.  This is called picture smocking.  
When I pull out the pleating threads, the pleats will hold their shape because of the four rows of smocking I did on the back.
Notice the trellis smocking in between the two top rows and the two bottom rows.


I finished the little pull toy ducks, aren't they cute?
I just have to sew l/4" buttons to the bottom of each duck.  
People are always asking me how long it takes to do a smocking inset like this one.
I counted this time and it took an hour to do each row and each duck, stitching over approximately 250 pleats.
  That comes to a total of 13 hours!!!  
I will be sewing the little blessing outfit this week and will show you the results :)

post signature

Feb 22, 2013

Riley Blake Block of the Month-February

February's block is a paper pieced heart.
I have only done one paper pieced before, my dots on dots block.
I have a simple tutorial here.
I cut the heart along the dark lines, there were six numbered sections.  I set the stitch length really short on my machine.
You sew fabric 1 to fabric 2 and sew the fabric right through the paper.  Then add number 3, and so on.


Here are all 6 completed sections.


I'm sewing the different sections together.


All of the sections are sewn together and it's time to tear off the paper.


The stitch length was so small or close together, that it perforated the paper making it very easy to tear.


The paper's all torn off but it sure doesn't look like a heart!
Notice how there is a seem going down the middle and another going across the middle.


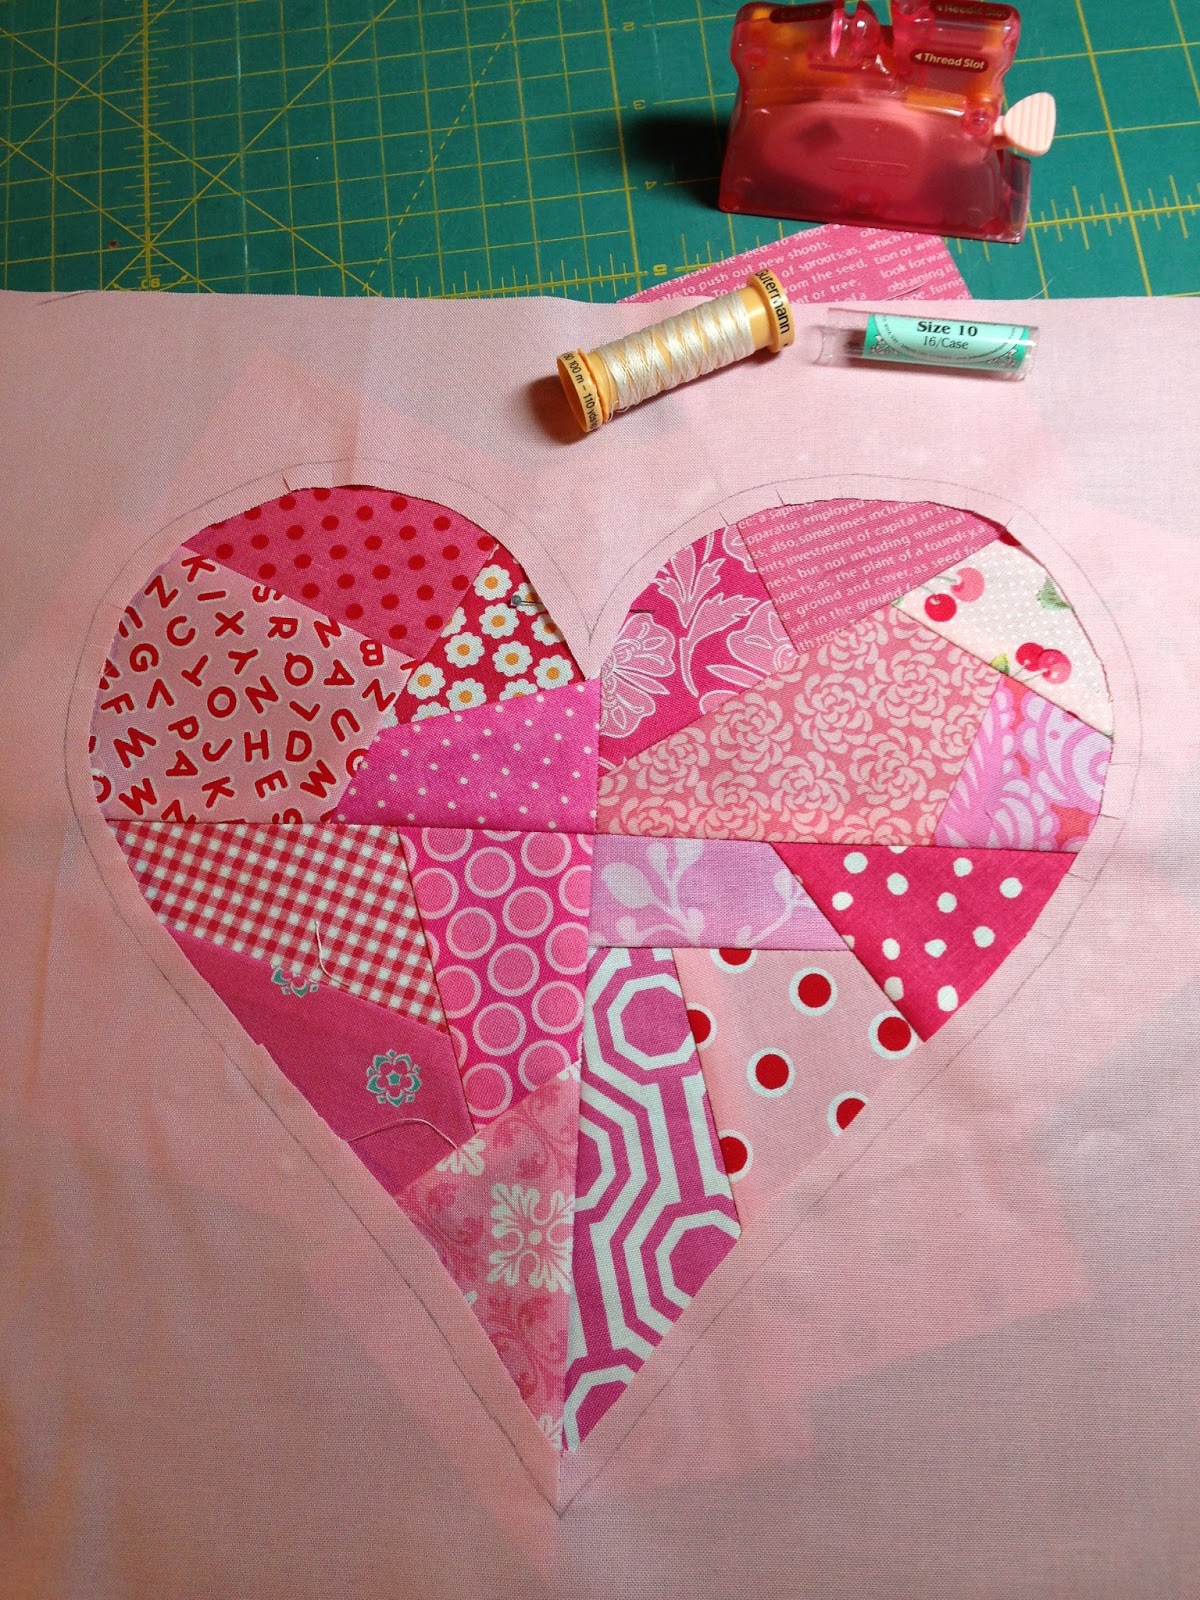
I took my 13" square base fabric and traced the heart template with pencil.  Then I trimmed l/4" away inside the heart.


The pencil line is the stitching line.
I will place the patchwork fabric under the heart opening and applique with the needle turn method.


I attached the heart opening onto the fabric with applique glue (Roxanne's glue baste).  I have my straw needles, cotton thread and needle threader, all tools of the trade :)
Do you see the fabric underneath the pink fabric? 
I won't trim it until I have finished appliqueing.


Straw needles are great for applique, but the eye is so teeny weeny that a fancy needle threader is a necessity, even for the best eyes!


I finished the needle turn applique and trimmed the fabric underneath so that only the l/4" seam allowance is visible.  
This seam disappears when the batting and backing are added.
I love my pink heart!  I know that it's a lot of pink.....I am thinking about introducing a new color in the sashing.


Here are January and February's blocks, I'm anxious to see what the  March block will be.


post signature

Feb 20, 2013

Riley Blake Design Block of the Month-January

I've decided to join the RBD  block of the month.
I just couldn't resist!!
This is the color family I'm going to use, PINK!


I cut out all my squares for January's block.


I drew the lines on all the squares to make half square triangles.


I'm making progress :)


I squared off all of the little blocks.


That's a lot of half square triangles!


Arrange them all in a certain order and.....a Chevron block is born.  The Chevron block didn't take very long to make.
This block of the month really appeals to me because there are only nine 12" blocks. 
 I know I can do that :)

post signature

Feb 18, 2013

Spools

This is Row 11 of Lori's Bee in my Bonnet Quilt Along.
Spools of thread, all in a row!
These are the fabrics I chose to create each little spool.


I really liked the gray Lori used for her spools, I was really tempted to do the same. 
Instead, I thought I would stick with off white, simply because I used the same color for my apple cores which you can see here.


The fabric I used for the spools has text on it.


This was probably the fastest row to cut and sew so far :)
I had to show you this aqua spool close up.
Doesn't it look like thread wound around the spool?


Here are all 14 spools.


Here are all my rows on my "faux" design wall.
A fancy way to say they are all taped to the wall.

post signature