Showing posts with label tutorial. Show all posts

Dec 12, 2012

Dolly Diaper Bag

Well, it's Christmas and there is so much to do!
I made a dolly diaper bag to go along with the doll bassinet and the baby doll for my grand daughter Maisie.
Here is the link to the tutorial, it is on my pinterest board, stuff to make for the grandkids.


The diaper bag is the perfect size for a 2 l/2 year old little girl :)
Isn't the print cute, sort of vintage looking?

I made a little burp pad for Maisie's new doll, so she can feel just like a real Mommy!


I bought a little snack cup with a lid and a spoon, and a teether for her diaper bag.  I even bought two doll baby bottles, one with milk and one with juice.  When you feed the doll, the liquid actually disappears.


I forgot to mention that I added two pockets on the inside of my dolly diaper bag.  One is on the side and one is on the center panel.

post signature

Dec 10, 2012

Doll Bassinet


My husband and I bought this cute doll for Maisie, one of our grand daughters.  It is a Corolle doll from France and has a soft bean filled body that is fun to carry around, hug and snuggle.  The doll always smells like baby powder too, even after being thrown in the washing machine.
Maisie's baby brother was born eight weeks early in September.  He is a little over nine pounds now, but we thought it would be fun to get her a doll that looks like her brother Benjamin.


I made a doll bassinet for three other grand daughters last Christmas, you can see them here, in an older post.
The bassinet takes a little time to make, but is still quite simple.
The tutorial tells you to machine quilt the body of the bassinet, like the hatching on Moses' basket.  These are all the pieces used to make the bassinet.


The tutorial can be found at Pinterest, on my "stuff to make for the grandkids" board, found here.  The link for the tutorial can be found here.  I made a mistake and quited the bassinet like a quilt.  I had to cut extra fabric for the lining again and resew it!!!  I was watching Hallmark Christmas movies and got distracted....Lol....


This is the finished doll bassinet.  I really like the baby blue rick rack trim instead of lace.  I think it is more baby boyish :)  I will show you the rest of the accessories I made for Maisie's baby boy doll in my next post.  Stay tuned!


post signature

Sep 12, 2012

Dots on Dots Blog Hop and Tutorial


Hi everyone, I am participating in the "Dots on Dots Blog Hop", sponsored by Quilt Taffy.  
The challenge was to make a 12" block, but you had to use one or more polka dot fabrics. 
I went to my fabric stash and learned something about myself, I love polka dots!!!
 I wanted to try something new, so I went to Pinterest and looked at my Quilt Blocks board.
I really liked the Rocky Road to Kansas quilt block.
It is paper pieced, and I have never tried that technique before.
There was a great tutorial by Fresh Lemon Quilts.
Here is the photo tutorial of my block.

I printed the template from Fresh Lemon Quilts, very easy!
I wanted a scrappy star, so I cut all my polka dots strips to sew together.


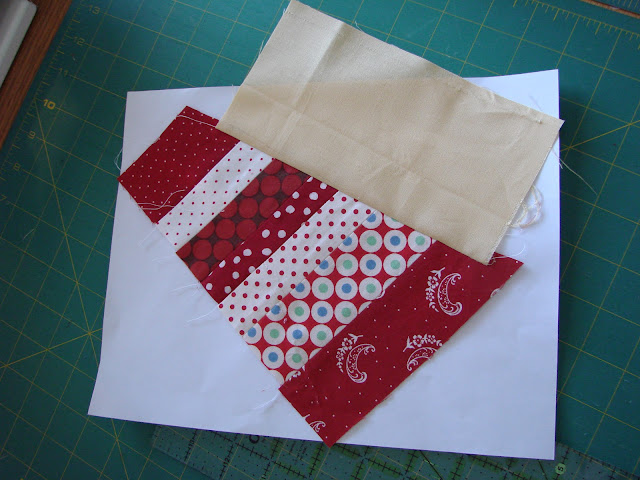
I arranged the polka dot fabrics strips in the order I liked them best.


Then I sewed each stack together.


You set your stitch length to a low number so that the stitches are really small, and the paper will rip away from the stitches really easily.  You just sew along the line on the pattern.


This is what it looks like on the back.


The yellow fabric is pressed back, all while keeping the paper pattern intact.


The paper pattern is meant to put on a light box so that you can place the fabric with a l/4" seam allowance.


You sew the fabric pieces on in order, starting with attaching 2 to 1 and 3 to 1, and so on.


This is sewing piece number 3 to piece number 1, while watching the tutorial on my ipad.


After the piece is sewn on, you trim the seam allowance to l/4".


Finally, piece number 4 is sewn onto piece number 1.


All the pieces are sewn together and pressed, now it is time to trim.


Trimming is so easy, you just cut along the outside lines.


It is so easy!  The inner line is the sewing line.


My square is complete, just need to make 3 more.  For each square, you will need a paper pattern.


Since the square is complete, it is time to rip off the paper pattern.


I am thrilled, my square looks perfect!


Here is my unfinished 12 l/2" square.  
Paper piecing was fun, I am going to make some more projects using this method!


I added a l l/2" border to my square.


I tried "pebble" quilting, and it looks like polka dots!


Since this block was so little, it was perfect to try a new quilting design.


A scrappy Road to Kansas Star looks great with a scrappy binding.


It's all finished, do you like it?  It is a 14" decoration for my tabletop.


Even the back is dotty :)


These are the rest of the blogs who are on the blog hop today.
Thanks for visiting mine, now if you want to be dotty, take a look at all the others.

September 12th


If you want to visit all of the blogs on their respective days, just click on my dots to dots button on the right of my blog.

Aug 20, 2012

Baby Brit Quilt Along, week #3

Welcome to week #3 of the Baby Brit Quilt Along, we have made half of our blocks now.  I am so excited to see my daughters' finished blocks.  Remember to upload the photos of your finished blocks to the Baby Brit group on flickr.
I chose this color combination this time.  I sewed the five strips of fabric together.


I may be weird, but I'm excited about these large scraps of fabric!  
I love using scraps in projects.


Remember to cut out all four rectangles using the template, but reversing two of them so that you will have a perfect "x" pattern.

Here is my perfect "x" pattern.


I sewed the skinny light blue strips to each of the four rectangles.
Press the seams towards the skinny strips.


I didn't take a photo of the three strip piece of fabric this time, but I sewed it between the two rectangles.  You can look at week #1 and week #2 to see the photo tutorial for this step.


The last step is adding the long red polka dot strip between the two rectangles.


The block is complete! 
 I get a thrill of seeing the pattern come to life :)


Here is Lindsay's block, I think it is stunning with the rich yellow, contrasted by the soft blues and greens :)


I bought my sashing when I bought my fabric for the blocks.
That was a mistake, because now that I have some of my blocks made, I see that if I have too many polka dots.
Now is the time to start thinking about the fabric that you want to use for sashing.  I took my blocks to my local fabric shop and laid them on the floor.  I auditioned different fabrics next to them to see what looked best.  I have finally figured out what I am going to use and will show you when I am ready to sew the sashing.
Happy sewing, I am excited to see your photos on Flickr!!!


post signature

Aug 15, 2012

Water Bottle Apron Class

Sew Katie Jean, the quilt shop in my area, has been open for a year.   Katie is celebrating her one year anniversary.  Each day of the week, she is having one of her instructors teach a mini class.  My day was today, and I taught the "water bottle apron" class.  I found the pattern and tutorial at Bee in my Bonnet.
Here are the little aprons I made.


These are the darling sisters who took my class.  From left to right, they are Sarah (9 yrs.), Beth (12 yrs.) and Abby (11yrs.).  They were so excited about learning how to sew!  First I taught them how to press, because that is a lost art.  They were such sweet girls, and I had a great time.  You can tell by their smiles that they did too!  


Teaching young girls to sew is very rewarding. They are like sponges, clinging on to every word you say.  I think it's really special when young people are eager to learn how to sew!


post signature

Aug 13, 2012

Baby Brit Quilt Along, week #2

If you haven't joined the "Baby Brit" quilt along yet, it isn't too late.
Once you get the fabric cut, these blocks don't take very long to sew together.
Week #1's tutorial is here.
You can upload the photos of your blocks onto Flickr, on
 the "Baby Brit" group HERE.
I am so excited to see your finished blocks, that I can hardly contain myself :)
This is the color scheme I chose to sew together this week.


I never throw away these scraps, they can be used to cut squares for another quilt :)


I have all four rectangles cut out.  I am really careful to cut two rectangles and then turn the template the other direction and cut two more rectangles.  I would be so upset if the crosses didn't match, I would have to buy three more pieces of fabric, and Material Girls is in another state.  I can't just get in my car and drive there in 5 minutes like I used to be able to do!


The skinny light blue polka dot strips are ready to be sewn onto the rectangles.


The light blue polka dot strips are sew onto the rectangles and pressed towards the light blue polka dot strips.


I cut the edge of the three strip flush with the edge of the ruler so it will be straight.  Notice how the bottom long edge of the fabric is even with the horizontal line on the cutting mat.


I cut the two strips I needed and have a long strip leftover which I will put in my scrap box.


The two strips are ready to sew between each of the two rectangles.
The long red strip of fabric on the left is waiting to be sewn next.


The seams are always pressed towards the skinny light blue polka dot fabric.


Now it's time to sew the long red strip to the two rectangles.


My second block is complete, it looks similar to true Union Jack colors.


I am so excited about my daughters' blocks!  They are part of the reason I began this quilt along.  
Lindsay went to Material Girls quilt shop and chose her six fabrics.
I especially like her greens and gold, and blue houndstooth.


One of the most enjoyable parts about making a quilt is choosing the fabric.  I love to see what different people choose.


Here is Lindsay's finished block.  It is really beautiful.  
I was so excited to see the photo in my email!


This is Rebecca's block, very original.  This is what she said,

"I decided to try something a little different to get a more vintage look (hopefully) and to repurpose some fabrics by using clothes to make these blocks.  I used two pairs of pants, a dress, a nightgown, and two shirts. It took a few extra hours to cut the strips out of each article of clothing and make sure they were the right measurements, so it definitely added some time to my first block.  I think it is worth it if you have some favorite clothes you want to keep a piece of, or if you want to work in some of the details of clothing into the quilt, such as buttons, pockets, or pleats.  Or just for fun."


We will see you next Monday for week #3 :)


post signature