
The Quilty Fun Birthday Cake pattern was designed by Lori Holt, of Bee in my Bonnet.
You can find the free pattern at Fat Quarter Shop's Jolly Jabber.
I went a step further, monogrammed the cake and turned it into a banner.
I'm thinking it's great for hanging on the wall and celebrating your birthday for a week or even a month!
I'm almost through making one for each of my grandchildren and some of my daughters :)
I've created a tutorial for the monogramming and banner.
My first step was to choose my fabric, one of my favorite parts!

I cut out all the pieces and labeled them with Alphabitties which I purchased at the Fat Quarter Shop.
I have two sets, and use them all the time!

There are quite a few half square triangles to sew, I like to use my Omnigrid ruler which I bought as a trio.
Well worth the price, I use them all the time!
My Pentel mechanical pencil helps me draw a nice, thin line.

Drawing a line on the square helps with accuracy.

After a bit more sewing, I have 3 sections of the cake completed.
It's like constructing a puzzle, one piece at a time.

My Quilty Fun Birthday Cake is baked, now it's time to monogram.
I'm baking this cake for my granddaughter Reagan who is turning 5 in November.
I know that purple is her favorite color, but a good purple is hard to find.
I don't have very much purple fabric, but I did have these fat quarters and am very pleased with them.
I added a happy pop of yellow for the cake pedestal.

I like to use Heat n Bond Lite.
I cut a strip of paper 3 l/2" X 12 l/2", not intending to use the full length this time.
Reagan is only 6 letters and won't take up that much space.

My Heat n Bond paper is 3 l/2" wide, and I want my letters to be 3" tall.
I used my omnigrid l/2" ruler to draw a l/4" line on top and on bottom, leaving me room to draw my 3" letters.

I drew the letters backwards, or reverse.
On close inspection, I noticed that the "G" wasn't backwards!

There we go, I just drew another one!
If you would like some templates of letters to trace, you can look here.

Cut a white piece of fabric 4 l/2" wide X 12 l/2" long, to sew the letters on.

Find the center of the fabric strip by folding in half and making a little crease with your finger.

Press the letters that are drawn in reverse, to the wrong side of the fabric.
Cut the letters out, on the drawn lines.
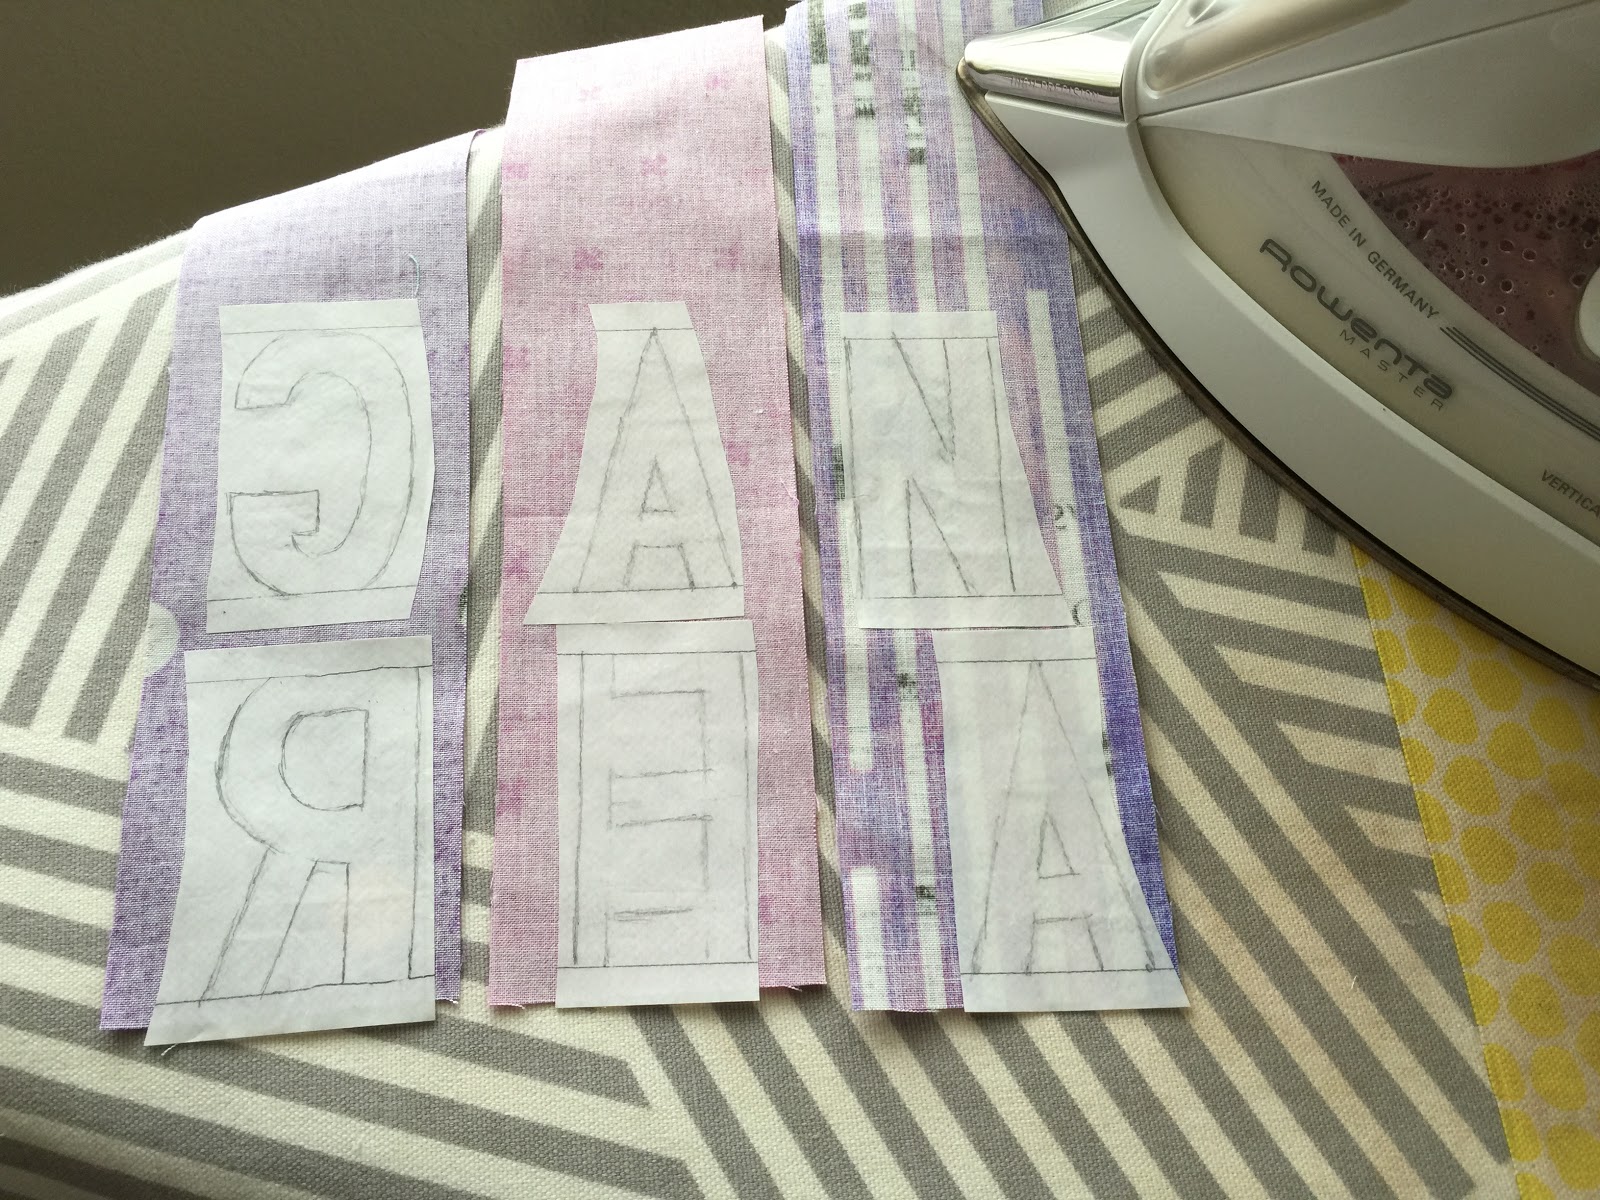
Whoops, I drew my "N" the wrong way!!!

That was an easy fix...no matter how many years you've been sewing, mistakes still happen!

Peel off the waxy paper backing and lay the letters on the white fabric.

Notice the center crease in the fabric that lets me see where the center is.

Aurifil 50 weight is my favorite thread to sew with.
I have lots of white, but not many colors.
I think I'll use the lighter pink.

I machine appliqué the letters with a blanket stitch.

The monogrammed piece is ready to sew onto the cake.

I cut the borders of the banner from "sprinkles" fabric, perfect for little girls!

The side border pieces are cut first.
Cut 2 - 2 l/2" X 18 1/2"

Great, the side borders are sewn on :)

The top and bottom borders are next.
Cut 2 - 2 l/2" X 16 l/2"

Yay, the borders are finished!

I'm auditioning 2 fat quarters for the binding.
I don't want yellow or purple, I want the binding to accentuate the purple cake and bow, and yellow pedestal.
I think the plain light pink will work really well!

Here's a closeup.
I think the herringbone is too busy...
Unfortunately, the cute little print on the light pink won't show up.

I like to cut my binding strips 2" wide.
I cut 4 of them out of a fat quarter, 22" long.

This is the backing I'm going to use for my cake banner.
It's whimsical and sunshiny looking :)

When I quilt my cake banner, I stitch in the ditch along the entire cake, pedestal and bow, with my walking foot.
I'd rather not quilt over the cake, and stitching in the ditch makes the cake pop, almost looking textured or three dimensional.

I sandwich my banner with the top, warm and natural batting and the backing, pin it and begin quilting.

When I'm done with my jigsaw machine quilting, I trim the banner.

All trimmed and ready to bind.

I sewed the binding around the banner.
If you'd like to know how I do this, I have a tutorial.

Here's a closeup of the jigsaw quilting, and I don't quilt over the letters.

I like to use these Clover clips instead of pins, to hold the binding in place.

I love hand stitching the binding, I find it very relaxing.

I finished my Quilty Fun Birthday Cake banner!


Here's a look at the back.

I hope you enjoyed my tutorial.
If you have any questions, please email me.
I love comments too :)

Thanks for sharing! A friend's daughter has her first birthday next week and this will be a great gift:-)
ReplyDeleteYour tutorial is excellent and your birthday cake is awfully cute! I made one for my daughters birthday last year and it was great for slipping into the mail as a surprise. I even had her pick the flavor! She couldn't imagine what I was up to. Sure wish I'd personalized it like you did!
ReplyDeleteI love how this came together! Beautiful!!
ReplyDeleteLook how fast you are. It's so cute and she is going to love it.
ReplyDeleteI had just been thinking about this cake block! Thanks for the tutorial and on adding the name to it. I nearly had this in mind as a Bees Knees project so that I could make it a birthday of the month type of quilt. The fabrics you used are super cute with it. I like how it made it all the more festive!
ReplyDeleteLove it!! I especially love the Sprinkles fabric... Need to find some of that!!
ReplyDeleteHi,
ReplyDeleteI just found you via Tanya in Co.!
Pinned to my "Quilts for Pip-Squeaks" board!
Quilty Huggs,
Jacqueline
Is there any way to get the fabric requirements? New quilter and not quite able to figure that out yet.
ReplyDeleteI concur with Judi! I absolutely love this pattern, and would like to make it for my bf of 21 yrs for her 30th bday.. I'm just not sure of material requirements when buying from a fabric store. Any help or suggestions is greatly appreciated! Thank you.
ReplyDelete