I wanted to make a soft photo book for my grand daughter Kylie, who is 6 months old. Her mom saved all of her empty, crinkly wet wipe containers for me :)
I wanted to make the pages out of minky fabric and print photos onto fabric that goes through an ink jet printer.
We have a black ink laser printer, but it is too hot and would smudge the ink on the fabric. I bought this pack at a quilt shop.
I selected the photos I wanted on my computer and chose wallet size. I fed two sheets into the printer one at a time, and they printed perfectly!
Since the photo book will be made out of soft minky, I want it to be round so there won't be any corners to flop around.
There is a transparent film on the back of the fabric that peels off.
The fabric needs to soak in a sink full of water for 5 minutes to set the ink.
I let the fabric dry on a towel and then pressed them on the ironing board, face down.
Here are the wet wipe containers that my sweet daughter in law saved for me. They can be any brand, it's the crinkly sound that babies like.
I found a round object that had the size circle I wanted, and traced one wet wipe circle for each page.
Then I made a pattern out of freezer paper.
The diameter of the circles is 5 l/4", and the connecter piece in the middle is l" tall by l l/2" wide.
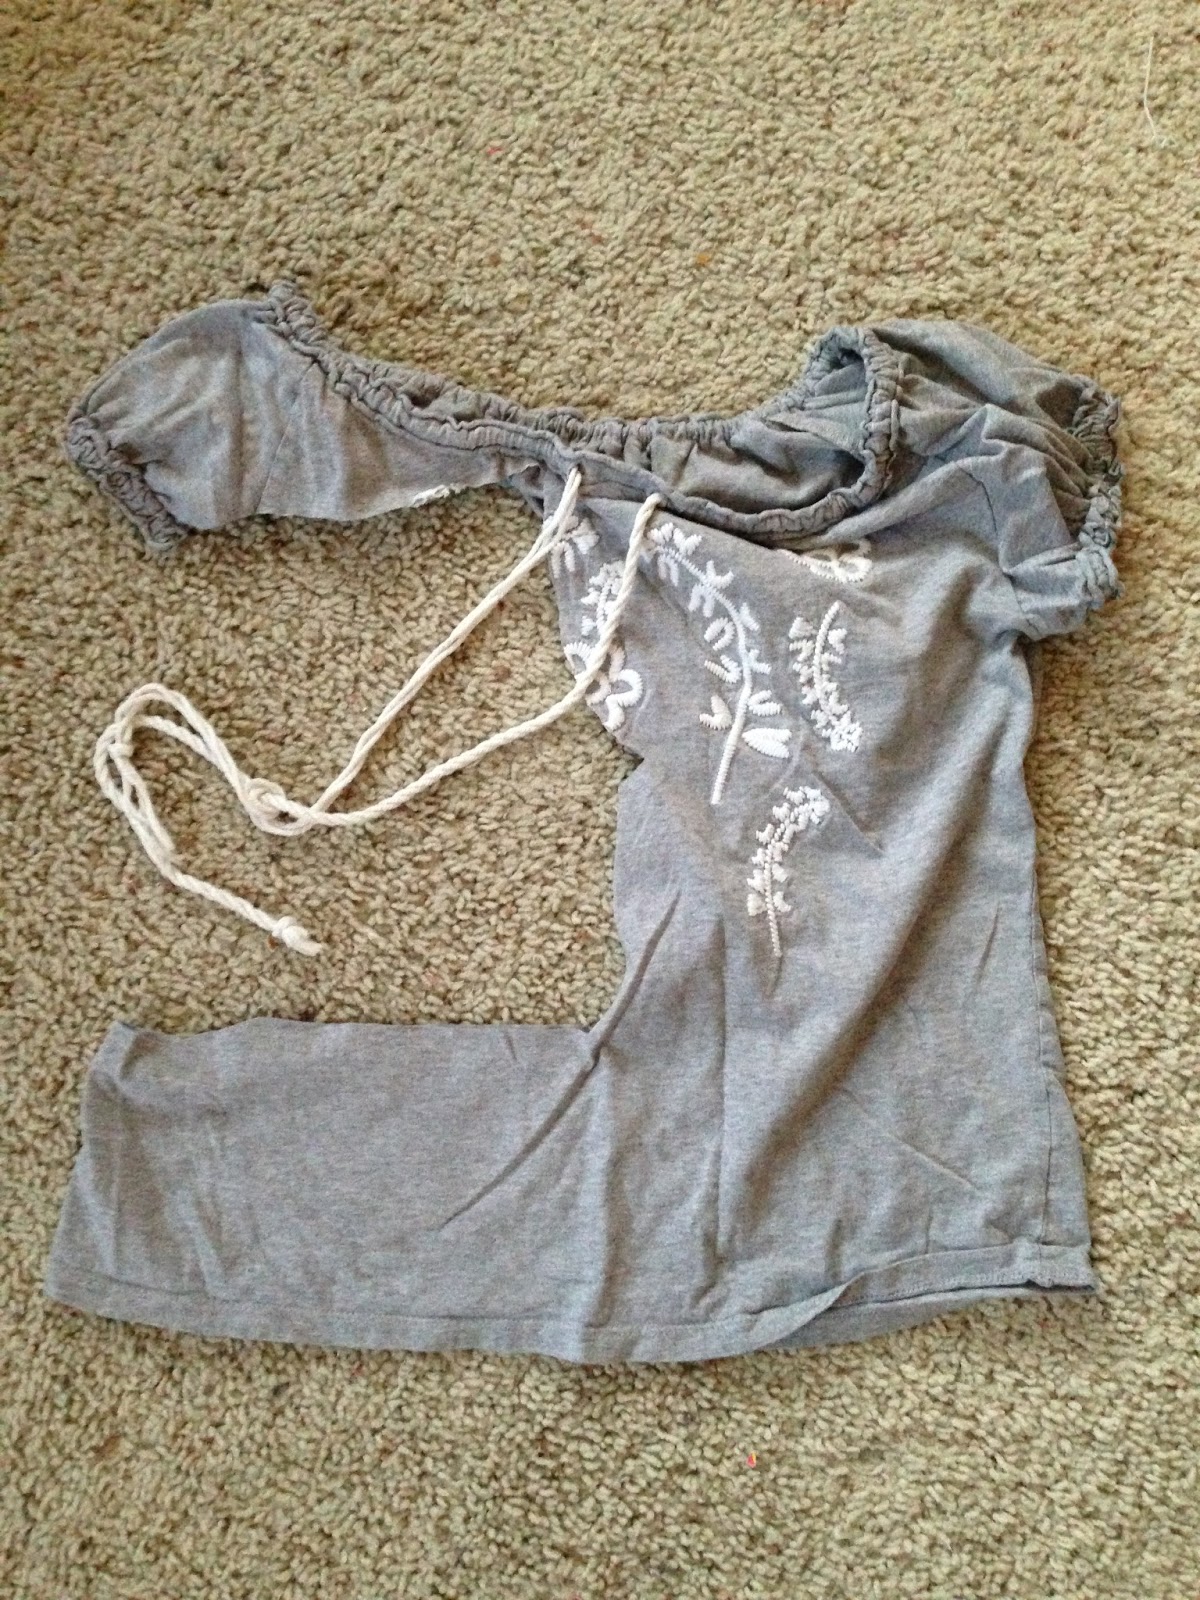
I guess I was in a hurry to finish this photo book, but I neglected to take pictures of the minky cut out!
I laid each minky piece on the table, one on top of each other.
I used 5 different minky colors.
I machine basted a wet wipe circle to each page, before I blanket stitched the photos onto the minky.
I added a narrow piece of lace around the cover page.
That is cute little Kylie on the front :)
I ironed some woven iron on stabilizer to the back of the fabric sheet of photos for durability.
I also ironed on some fusible heat n bond. I always use a cloth to iron on top of the minky. Sometimes the heat can melt it so you have to be careful about that.
I placed the photo on the minky and ironed it in place.
I sewed the photo fabric circle to the minky and wet wipe plastic with a blanket stitch on my sewing machine.
These two photos are Kylie's dad when he was a baby :)
These two photos are Kylie's older sister, Neo :)
This is the middle of the photo book.
Can you see the shape that I cut each page out with the tab in the middle?
At first, I tried turning the pages right side out throught the tab.....impossible!!!! Then I just left the bottom middle third unsewn and turned the page right side out.
I turned the rest of the book under at the seam and topstitched.
I sewed a rectangle around the tab in the middle of the book to reinforce it, and another stitching line down the middle.
The rest of the photos are Kylie's cousins on her father's side of the family.
I sewed different textures of ribbon randomly around some of the pages.
Here's Kylie again, at the end of the book!
I sewed a big button really, really well onto the back.
I sewed a hair elastic to the front page and it closes by folding over the button. It looks cute but I went to bed worrying that what if......Kylie went to bed with the book and was able to bite the button off? It bothered me a lot.......so the next morning I very painstakinly took out the stitches, which I could barely see because they were buried in the minky fur :).
This is much better and safer for my little grand daughter! I sewed a tab into the seam of the front and it connects to the back with velcro.
I won't have to worry about Kylie anymore, her book is baby safe :)
I got a little carried away by putting all six of Kylie's cousin's photos in her book, it's a little thick.....
It would have been just as cute with only her own family's photos.
Here's another cute little toy I made for Kylie with "fairy" fabric on the front, crinkly wet wipe plastic on the inside and minky on the back. Babies love to squish these and chew on them :)
Here's little Kylie with her photo book.
Doesn't she have the cutest little doll face, and beautiful curly hair?
Something magical happens to you when you become a grandmother, I know it did to me!!!

-009.JPG)


.JPG)

-001.JPG)
-002.JPG)