Jun 25, 2014

Burp Pads


I made some burp pads for Paisley Louise.


I lined this one with some super soft minky, the same fabric that is on the back of Paisley Louise's baby quilt.


Don't you just love Little Red Riding Hood and the big bad wolf?


I like this one too, there's a lot of bright colors and fun things going on!


Japanese fabric is so soft.


I backed on with chenille.


All wrapped up and ready to give :)

post signature

Jun 20, 2014

Modern Instabee 2014, June


I've posted about this before, but I belong to Hive 11 of the Modern Instabee.
I found out about the group on Instagram.
There are 13 quilts or quilt blocks in this book.
There are 12 members in the hive.
Each member chooses a month, mine is October.
You tell the hive which block you want and what colors.
Sometimes one of the members will send us a square to use for the center of the triple star block.


The triple star block has been the most popular so far.
This hive member wanted her block in orange, yellow and a mossy green.


I made the block a little differently this time, I hope she likes it :)
Usually, you rotate the colors.
I made each layer of points the same color.


The finished block, the triple star.

post signature

Jun 18, 2014

DresdenI


I chose these fabrics to make my daughter a Dresden table topper.
These fabrics are mostly Heather Bailey and Amy Butler.
I know that she loves mint green :)


Have you ever made one of these dresdens?
I put the petals on the design board in the order I want them.


I sewed all the petals together and placed them on a linen background.


I stitched the petals and center circle onto the background fabric with a little zigzag stitch and some invisible thread.


I prepared the block for machine quilting.


I used my favorite thread, Aurifil.


I stitched in the ditch on the dresden petals, did a pebble stitch on the back ground, with a little swirl in the center.


The name of the mint green solid is Kona pond.  
I really like it!


I love the back too :)


These dresden blocks are a lot of fun to make!

post signature

Jun 16, 2014

Tee Shirt Quilt, finished!


I have been working on this quilt since January, 5 months ago!
I cut strips of fabric for the binding, then the quilt sat for about 6 weeks.
I had too many other things to do....
Sean recently asked me when I was going to finish his quilt.
I put everything else aside and sewed and pressed the binding.


I sewed the binding onto the quilt and hand stitched the binding to the back until I was finished.
It took about 3 days.


The quilt is really gorgeous, I'm very pleased with it :)
I can tell you the meaning of every tee shirt on this quilt, it has been a walk down memory lane.


I put the quilt on Sean's bed while he was gone.
When he came home, he went upstairs to his bedroom.
He came down shortly after with the biggest smile on his face.
Then he gave me the biggest, longest hug!
It was worth every moment of hard but enjoyable work :)


I haven't seen Sean's bed look like this since, but the quilt is finished and he loves it!!!

post signature

Jun 13, 2014

Thimble Baby Quilt


I posted about this quilt here, a couple of months ago.
I smoothed it out on the tile floor and pinned the front to the back.


I backed this quilt with a really soft minky fabric.
A tutorial told me to use spray glue but I thought it would be too messy.
The slippery tile floor helped!


It was late at night and I used my chin on my iPhone to take this photo of my machine quilting :)


The green fabric will be the binding for this little baby quilt.


 The binding is Polka dot stitches by Lori Holt, it is the perfect shade of green.


Yay, the quilt is finished!


Here is the soft minky that I backed the quilt with :)


Paisley Louise will love her colorful quilt!!!


post signature


Jun 11, 2014

Scrappy Happy Summer


Hi everyone! I have been so excited to start Lori's new sew along, Scrappy Happy Summer :)

Have you seen the movie Frozen?
There's a snowman in the movie named Olaf.
Click here for the cutest song about "summer".

I will be a month late in showing you my progress, because I am leaving to visit my children and grandchildren for a few weeks.
I bought my pattern and have no idea yet, which fabric I'll use.

post signature


Jun 9, 2014

Sewing Kit and tutorial

I made my 5th sewing kit that I've made, I made my first one here with a tutorial and a giveaway.
I made the 2nd sewing kit for my son, you can see it here.
The 3rd sewing kit that I made was for a sweet young woman, and it was my most viewed post ever!
You can see it here.
The 4th one is here, I made it with a Japanese theme :)
Now to get to my latest sewing kit.
I made it for a young man who is going on his two year church mission, to Portland, Oregon.
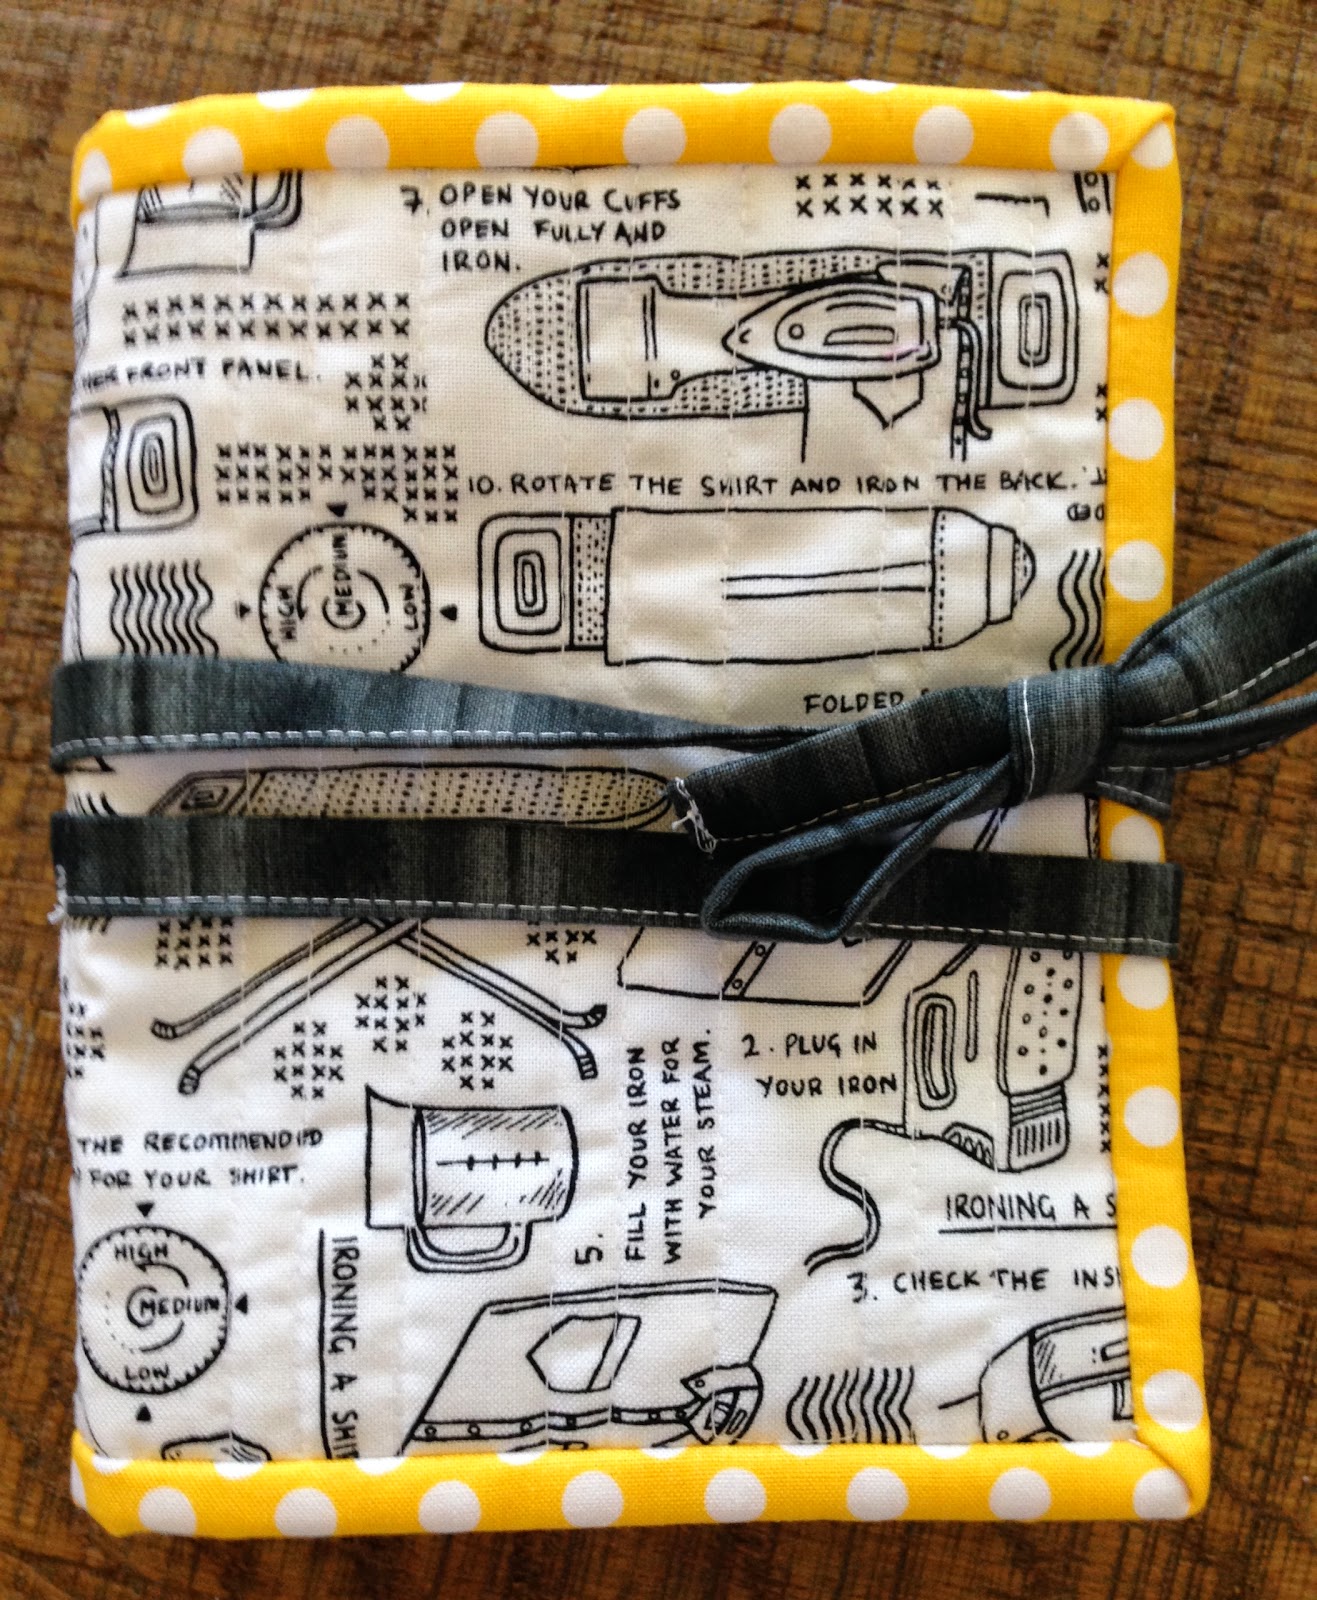
I just love this fabric called "12 steps to iron a shirt".
It actually lists the 12 different ways and has them numbered :)
Great fabric for a missionary who will be wearing a white shirt six days out of the week!


Daniel went to BYU for a year, so this fabric was perfect!
The colors of the Oregon flag are navy and yellow, that's why I bound the sewing kit in yellow :)


Here's a better closeup of the fabric.


I stocked the sewing kit with supplies.
The pocket on the left contains iron on patches, buttons for shirts and dress pants, and some fray check.
Lots of different sizes of safety pins, straight pins and needles.
I put some washi tape on the little black scissors so they could easily be slid out of their pocket.
The pocket on the right contains clothes pins (you never know...), a tape measure and some thread with another needle.


Daniel will be an exemplary missionary, I'm looking forward to hearing about all of his experiences in Oregon.


See you in 2 year Daniel :)